DO NOT use the machine without having received instructions and official permission from an authorized person.
Using the machine without permission may result in a ban from the Hobelhöhle or xHain.
The accident shows a considerable risk of injury from accidentally touching the running saw blade or cutting into the fingers of the hand holding the workpiece. Flying splinters or workpiece debris can cause eye injuries.
There is also an increased risk of people in the vicinity being injured by ejected cuttings.
Common causes of accidents are:
- Insufficient or defective saw blade cover
- Inadequate workpiece support and workpiece guidance
- No secure workpiece hold
- Ejection of cutting remnants
- reaching into the cutting plane while the saw blade is running

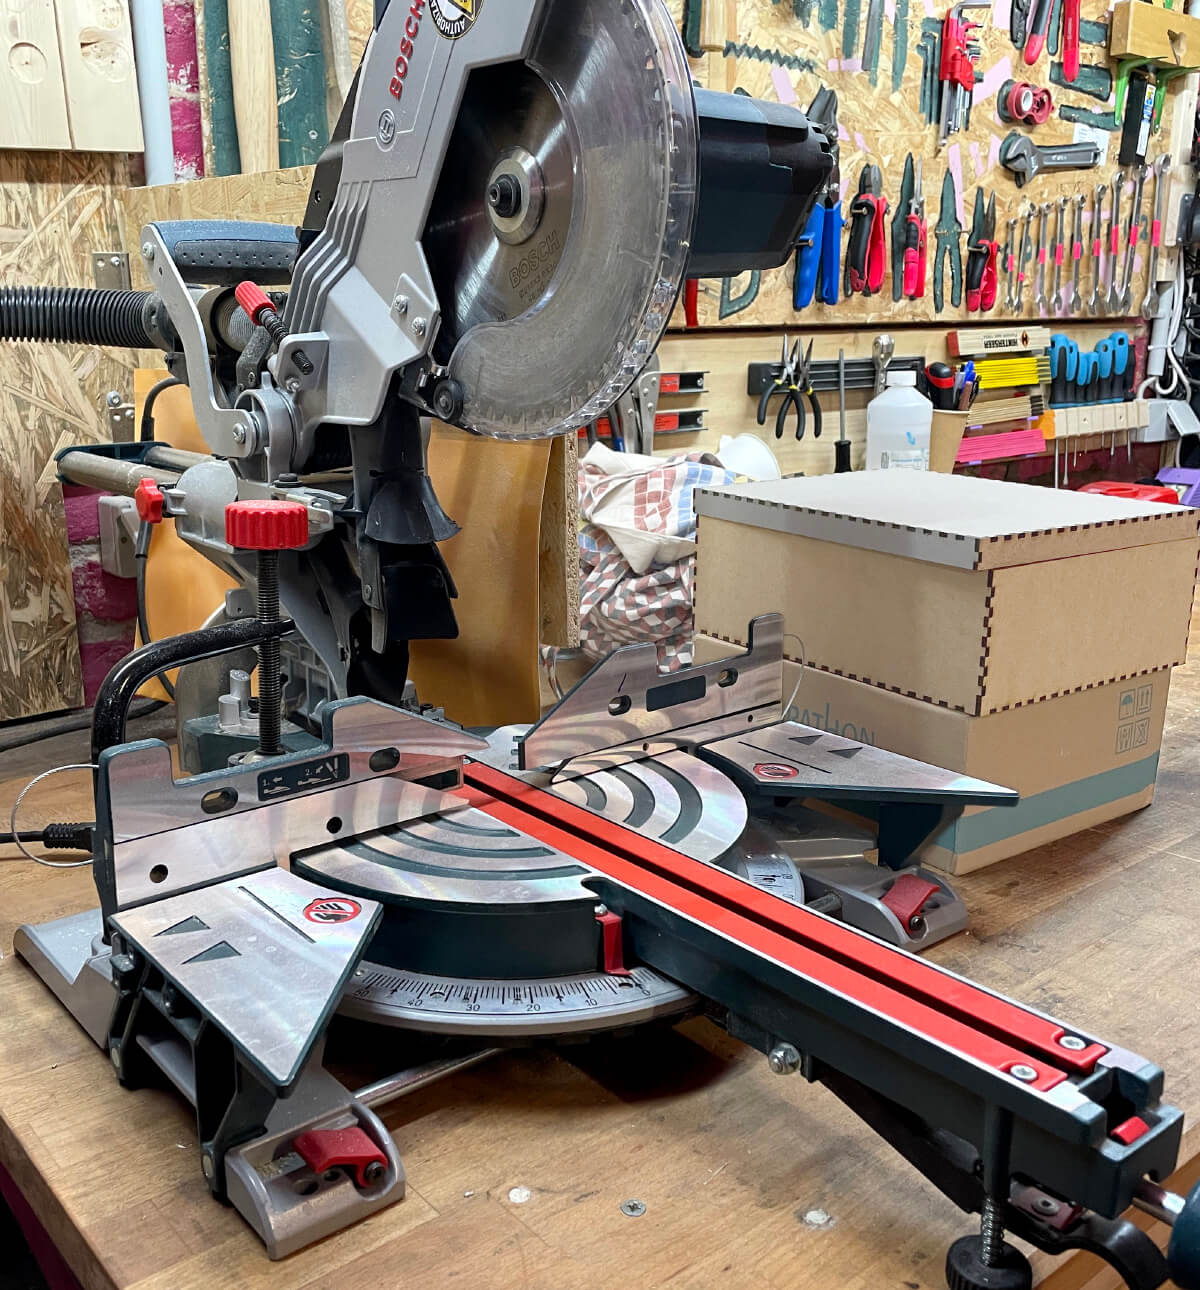
¶ Slide compound miter/drop saw
Please read the Space Rules first, especially the sections on "safety" and "use of machinery".
This page is intended as a reminder and does NOT replace a personal introduction to the miter saw.
If you break the rules layed out on this page, your permission can be revoked.
- contact: Please ask in the #hobelhoehle channel to receive a personal introduction
¶ Overview
- Manual: Manual Mitersaw PDF
- The miter saw (drop saw) is a machine for cutting wood against the grain and sizing panel materials to length.
¶ Safety gear required
- Eye protection (if necessary)
- Hearing protection (for everyone in the room)
¶ Safety instructions
- Only ever saw one workpiece at a time, as several workpieces lying on top of each other cannot be clamped securely and the saw blade can be blocked as a result.
- Never remove cutting residues while the saw blade is running.
- When cutting, make sure that your fingers are not in the cutting plane.
- Never hold the workpiece to the right of the saw blade with your left hand or vice versa.

- If the saw blade is jammed, switch off the machine immediately and disconnect the mains plug. Only then remove the jammed workpiece.
- When using the pull function, the sawing process must always be carried out from the outer edge towards the workpiece stop.
- Always disconnect the mains plug from the socket before carrying out any work on the machine.
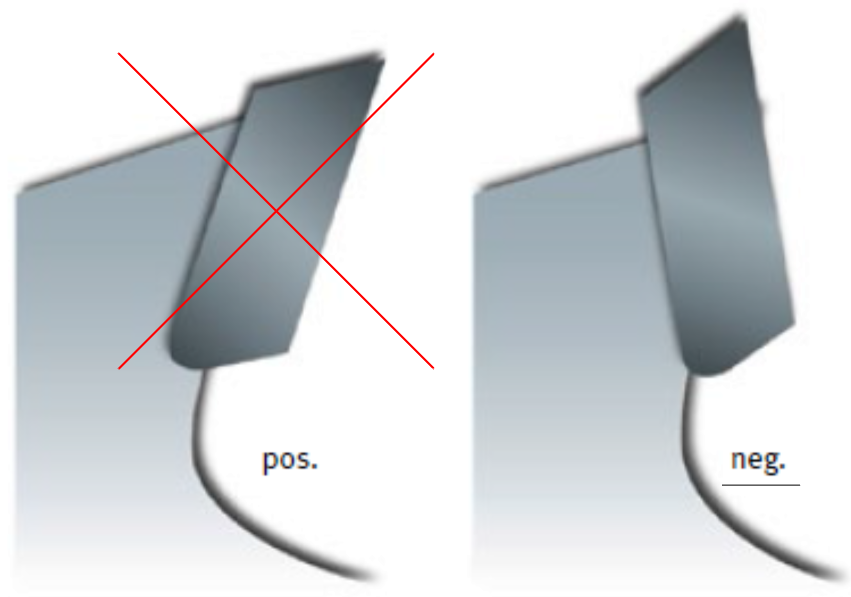
- When replacing the saw blade, ensure the correct size and the rake angle, which must be negative for cross-cut saws. Then adjust the cutting depth.
- Do not wear gloves.
¶ Setup
- Attach the vacuum to the back with the big zip tie (it's a little tricky to get it to stick in)
- Plug the saw into the vacuum and the vacuum into the wall (turn vacuum to turn on when the saw turns on)
- Unlock the forward control with the red screw on the left
- Unlock the drop control with the red pin on the right (you might need to twist it a bit to get it to come out)
- May need to move the saw a bit (depending on how big the piece of wood is)
- Make sure the saw is level after moving it (and the vacuum is still plugged in)
- Optional setup:
- The horizontal angle control is in the front
-- if necessary, set the stops back to avoid cutting into them - The vertical angle control is on the right
- Drop control has a stopper on the right if you don't want to cut all the way through the piece
- The horizontal angle control is in the front
- The clamp needs downward pressure to work (double check the wood is properly clamped)
- Waste goes to the left
- If the piece to the right is very long, put a block under it so it is stable
¶ Check list before cutting
- Eye and hearing protection
- Wood is clamped
- Laser is on the line
¶ Clean up
- Lock the forward control all the way back and lock the drop control down
- Take out the vacuum (need a knife to undue the zip tie without breaking it)
- Unplug the saw from the vacuum
- Vacuum up any waste
- Put the saw back in the corner
- Return safety gear
¶ Shortcuts
- Hobelhöhle
- Circular saw For ripping timber in fibre direction and panel materials
- Miter saw cuts timber and boards to length with angles of 90-45°
- Band saw for curved cuts or rough cutting of timber
- Thicknessing planer Makes timber thinner
- Drill press Makes holes in pretty much everything
- Lathe This is our lathe. There are many others like it, but this one is ours.
- CNC Does what the computer says
- Tormek Wet grinding machine for tool sharpening
Short URL: https://t1p.de/3df3e
