¶ Microscope Operation
If you want an introduction to be able to use the microscope, please ask in the #microscopy Matrix channel. Instructions below just serve as a helpful resource for beginners — please don't attempt to use the microscope without authorization, and fall back on a more experienced operator when unsure or experiencing problems.
This page is intended as a reminder for authorized operators only.
This operational guide does not authorize you to operate the microscope.
DO NOT use the microscope without having received instructions and official authorization.
¶ Booting and Laser Startup
-
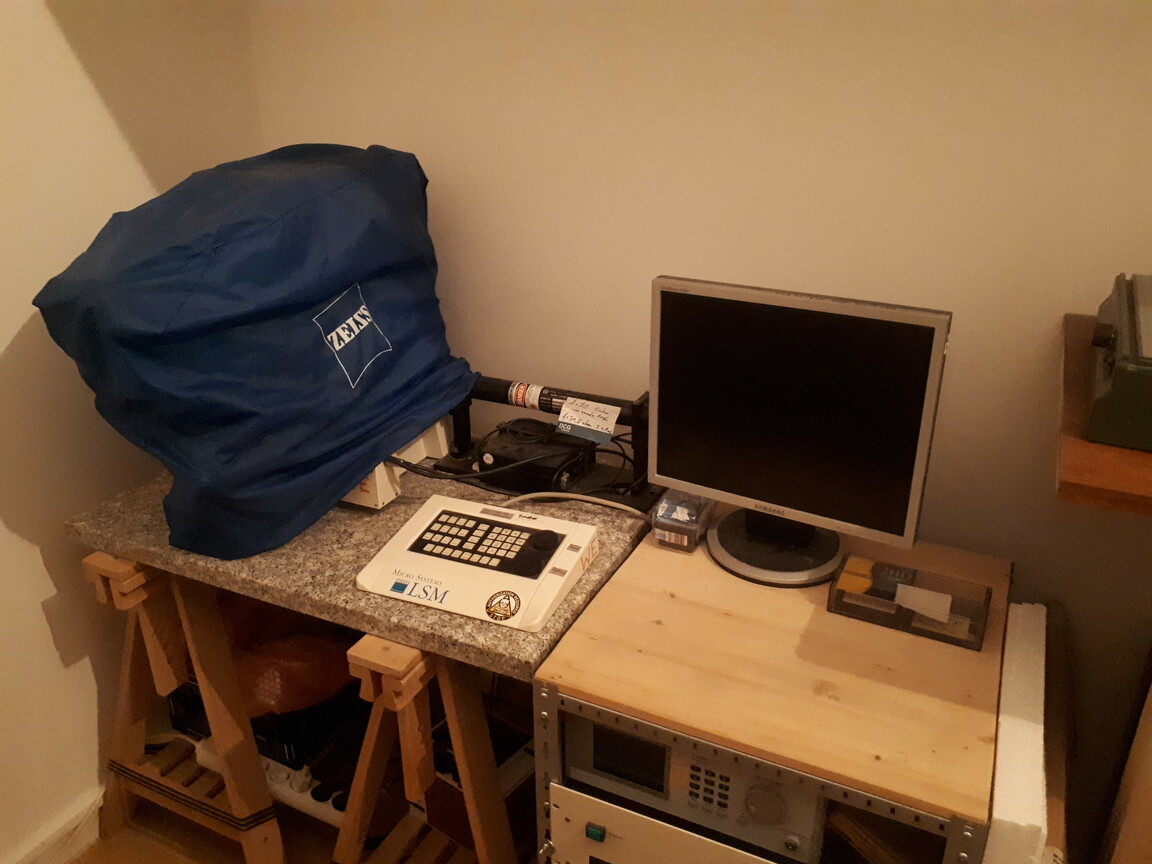
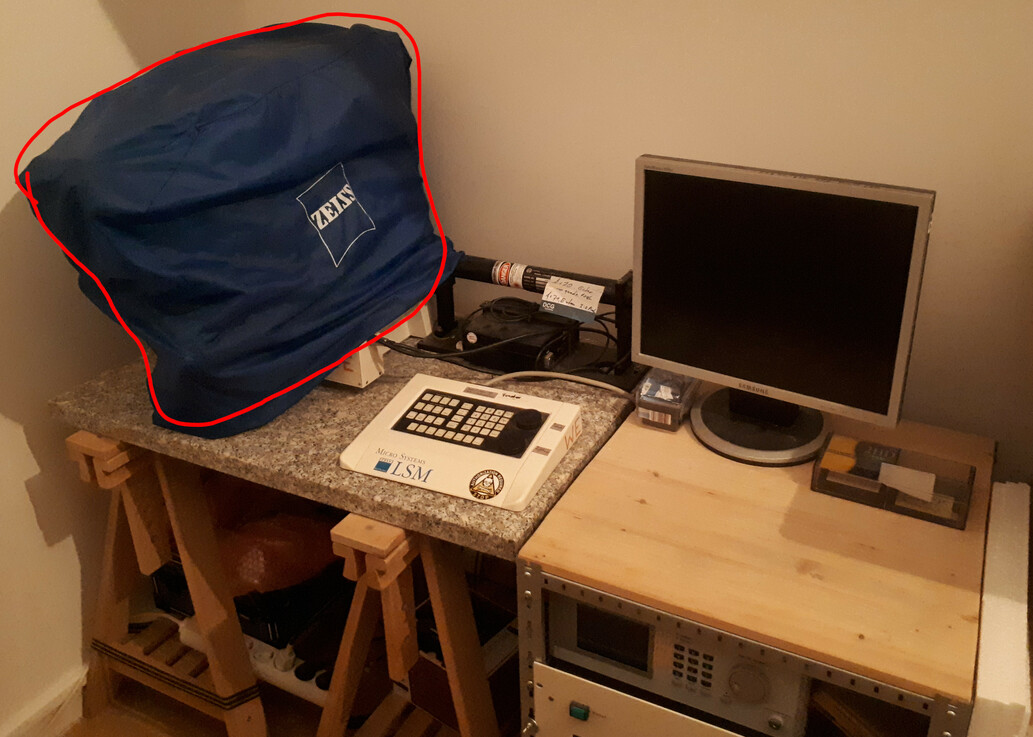
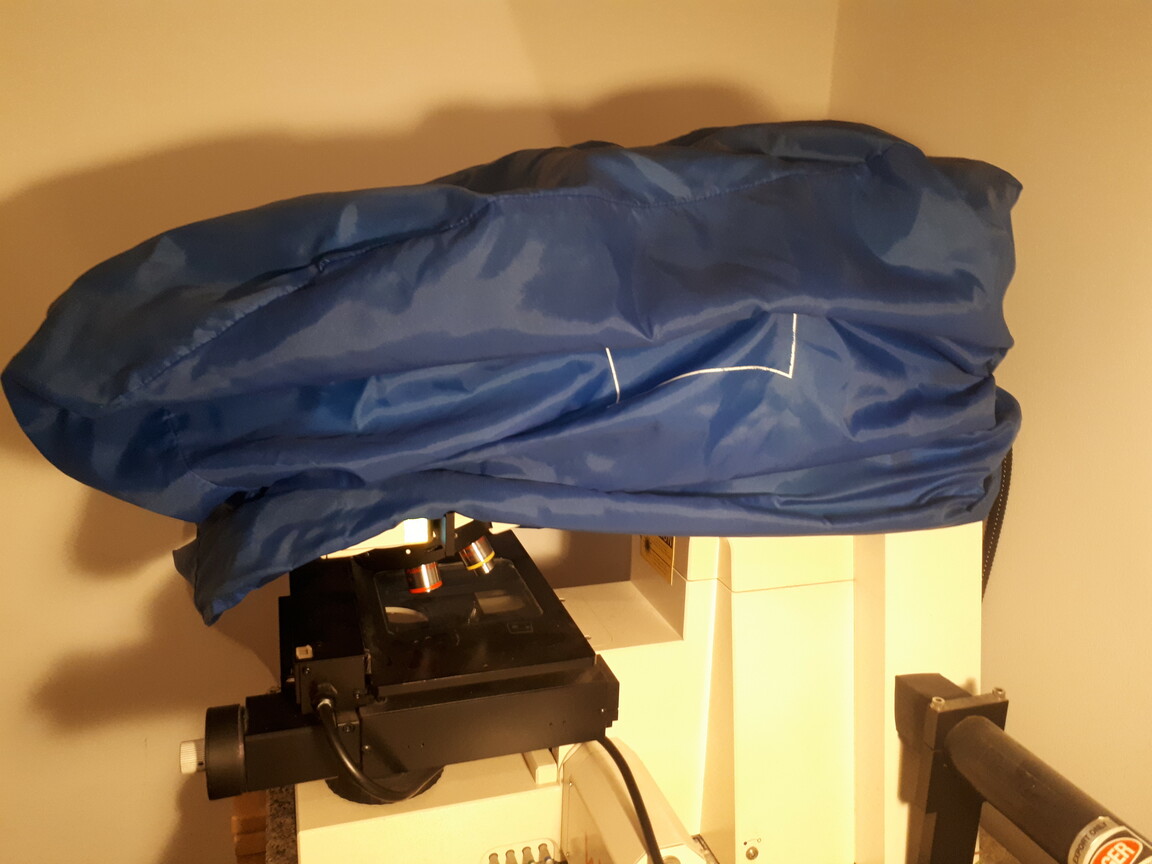
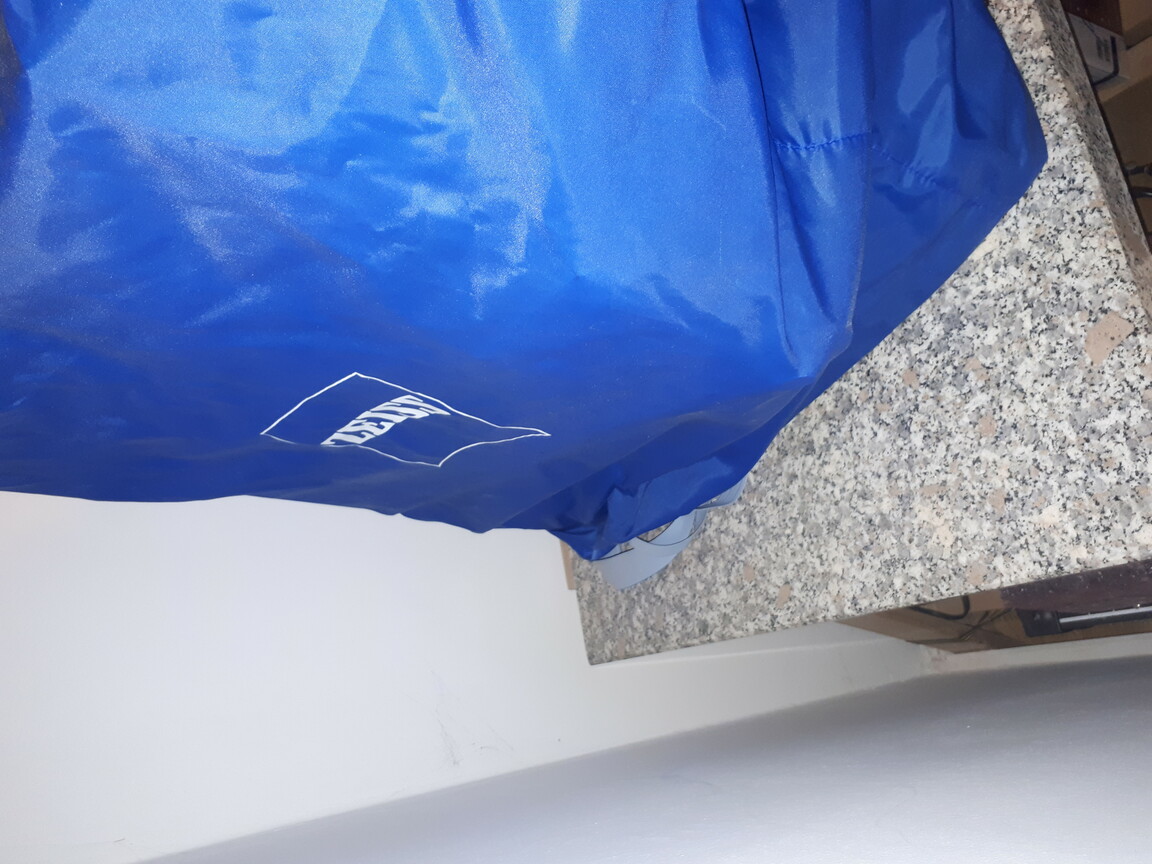
Remove the blue dust cover from the microscope. Make sure you don't touch the lenses when removing it.
-
Grab the "microscope boot stick" USB stick from the small container located on the right side of the rack.
-
Insert the USB boot stick into the USB port on the front of the computer.
-
Switch on the mains power switch located below the granite table on the right side.
-
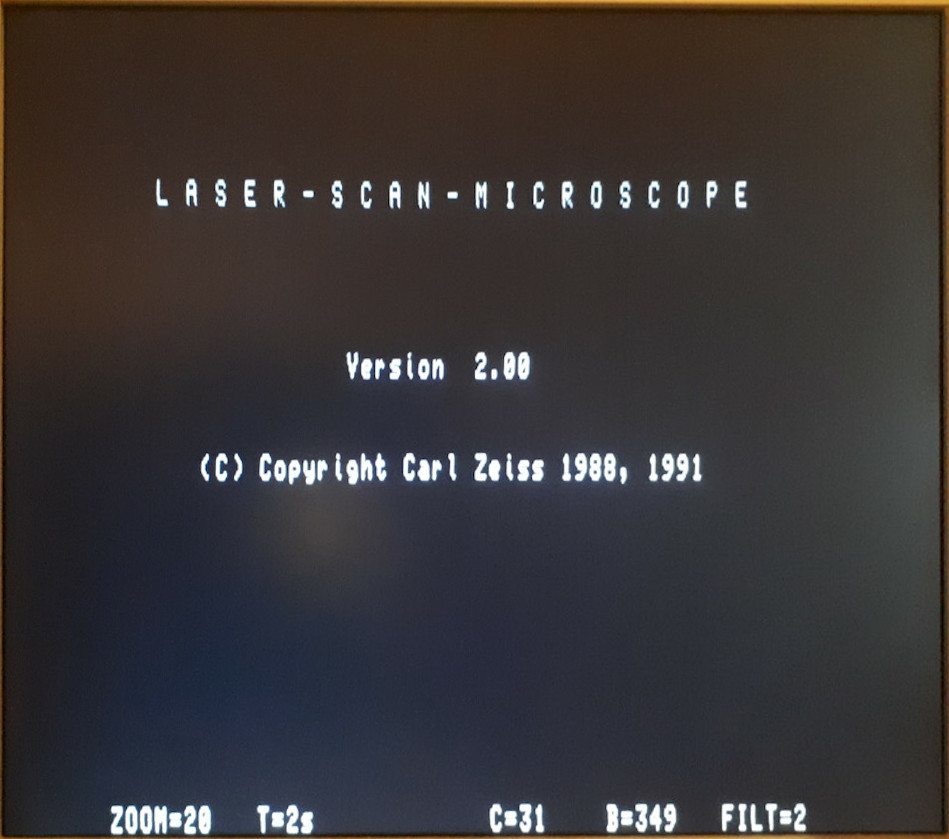
The display next to the USB port into which the USB stick was inserted will now start counting up until it reaches 80. Once it has finished loading, the monitor will display the welcome screen.
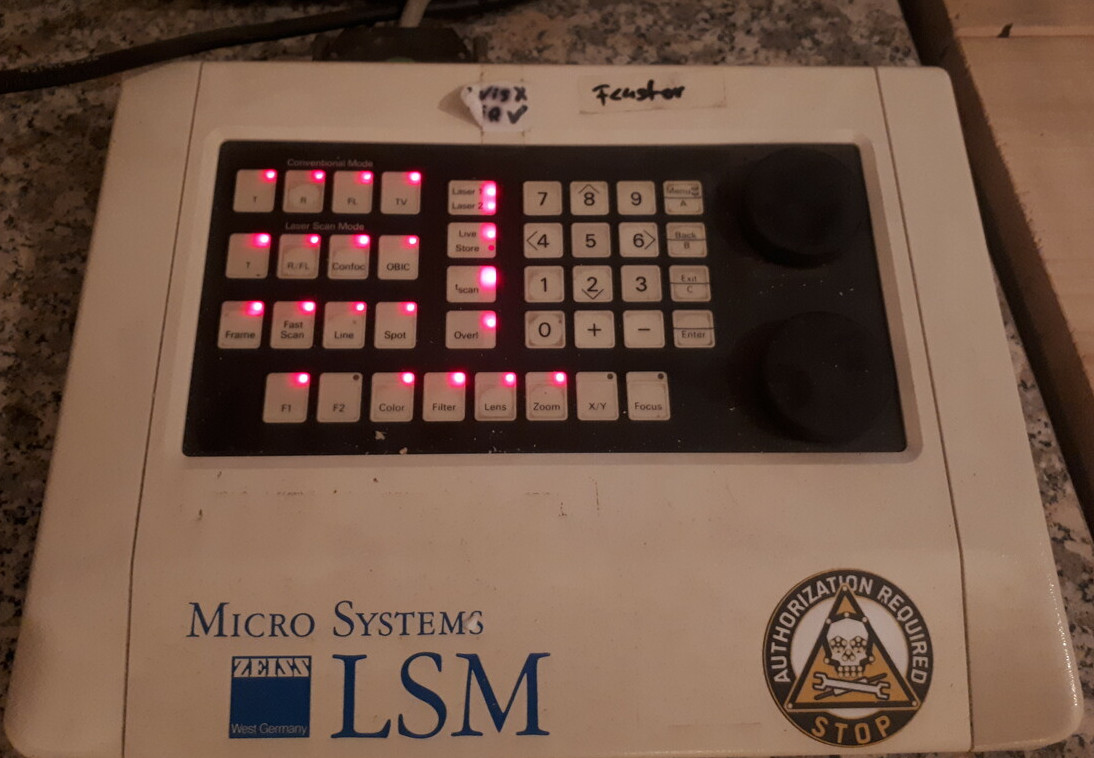
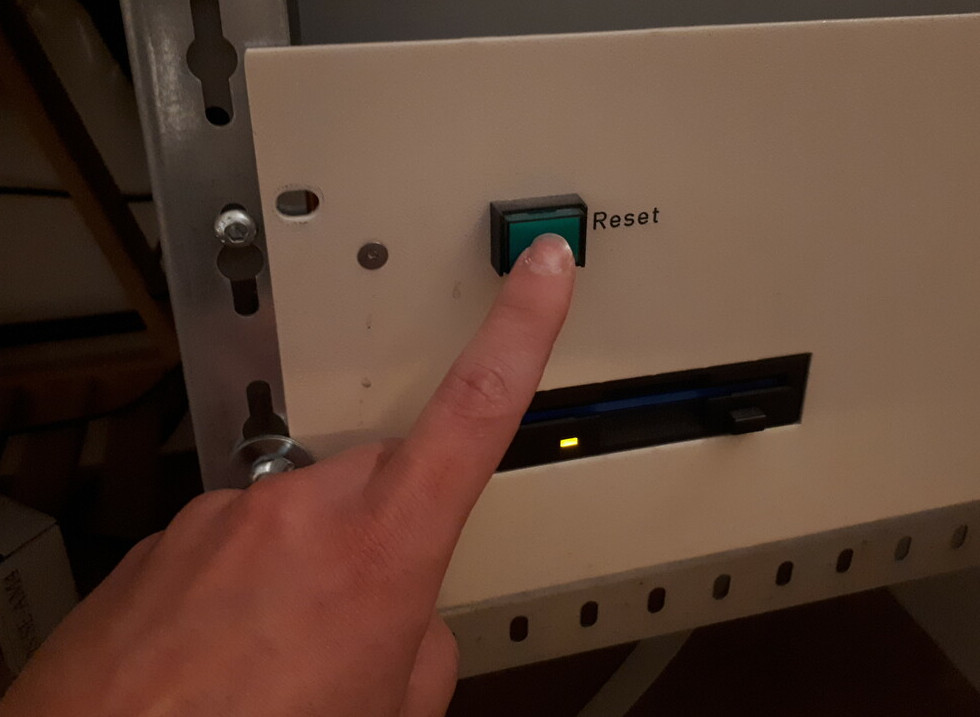
If all LEDs on the control panel are lit, press Reset (silver button on the PC rack). The computer will then restart.
-
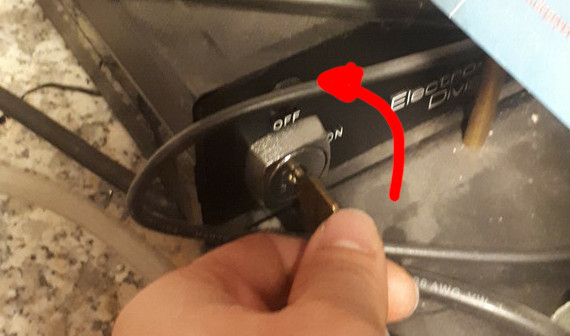
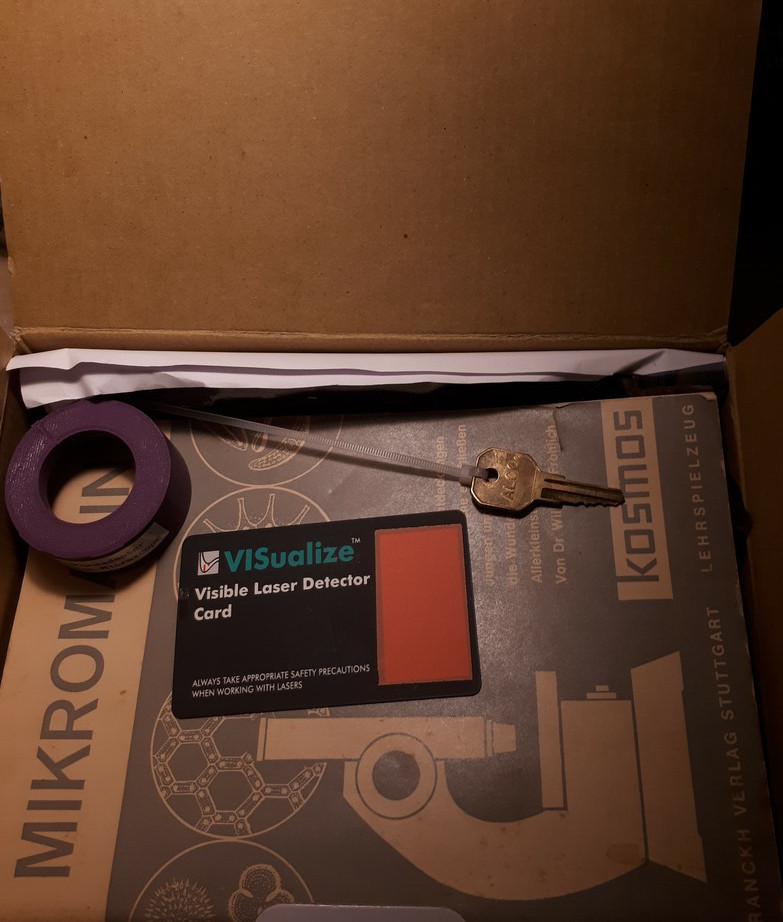
Switch on the laser with the key on the box labeled "PMS Electro-Optical Division"
TODO: add photo of box here. -
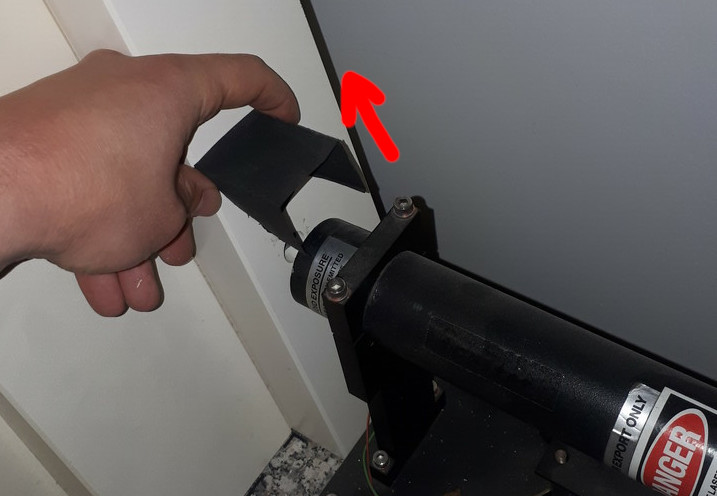
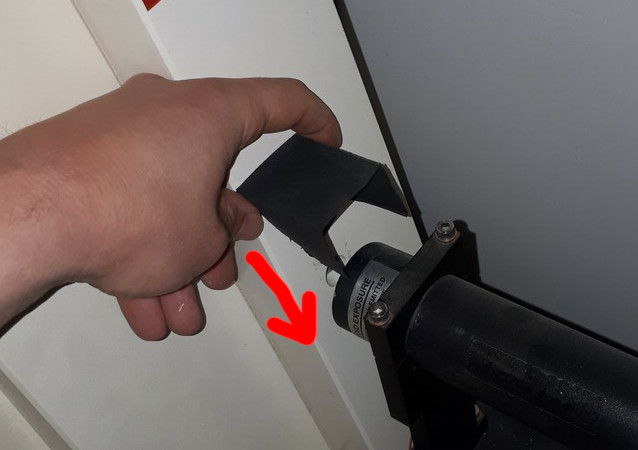
Remove the black dust cover between the HeNe Laser Tube and the microscope and hold the "Visible Laser" detector card into the beam to check if the laser turned on. This might take some time. (10 minutes).

-
Put the dust cover of the laser back.
-
(Optional) If there is a probe adjustment fixture on the table, remove it carefully.
-
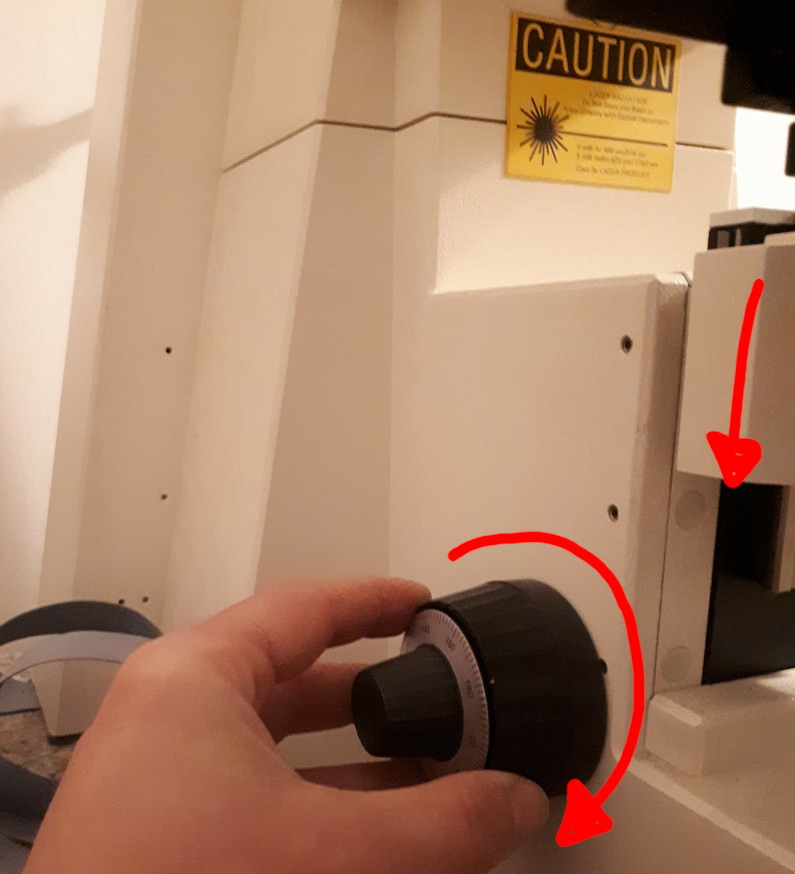
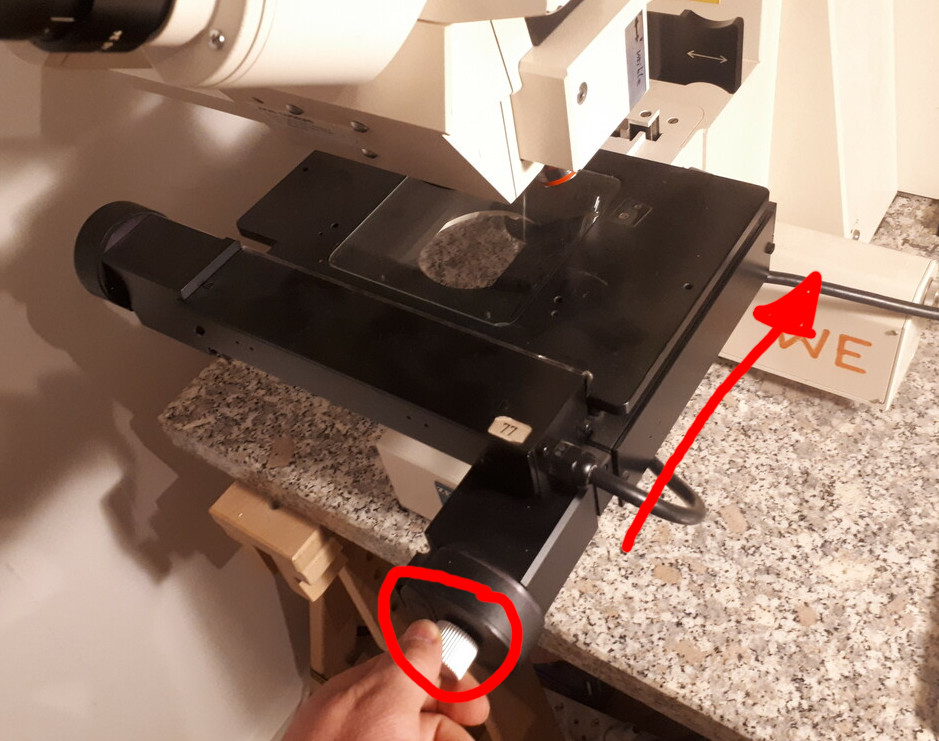
Use the front and left silver knobs on the table assembly to center the middle of the glass window over the cutout in the metal frame below that window.
-
The microscope is now ready for sample placement.
¶ Sample Placement and Conventional (Reflective) Mode
-
Boot the microscope according to the previous section.
-
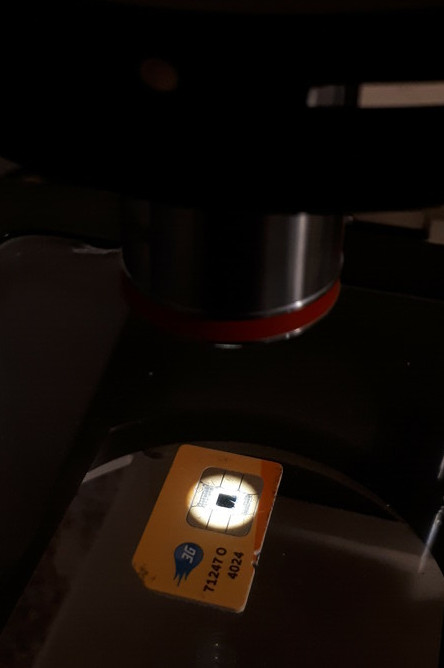
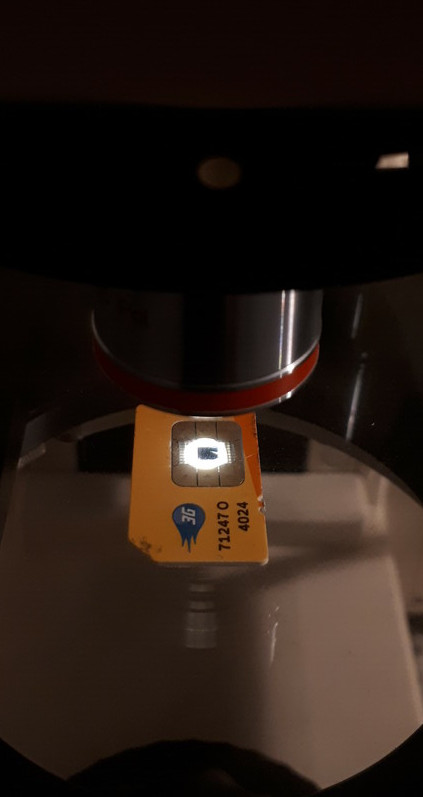
Place the sample you want to examine. (Example samples can be found in the respective samples box.) It should be placed in the center of the glass part of the table.
-
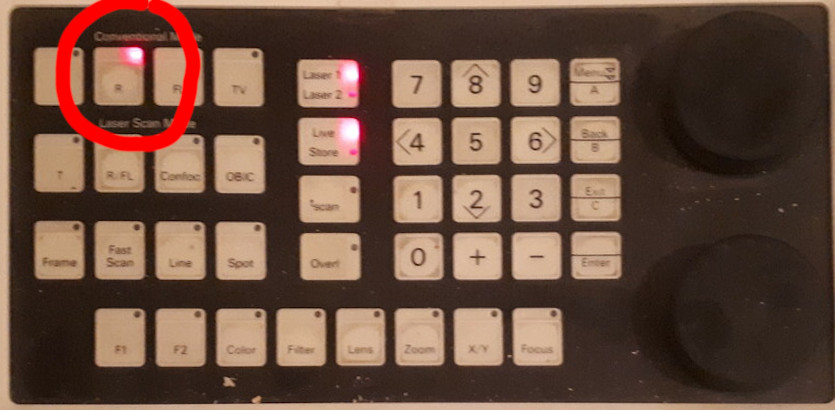
Make sure the microscope is in conventional "R" (=reflection) mode.
-
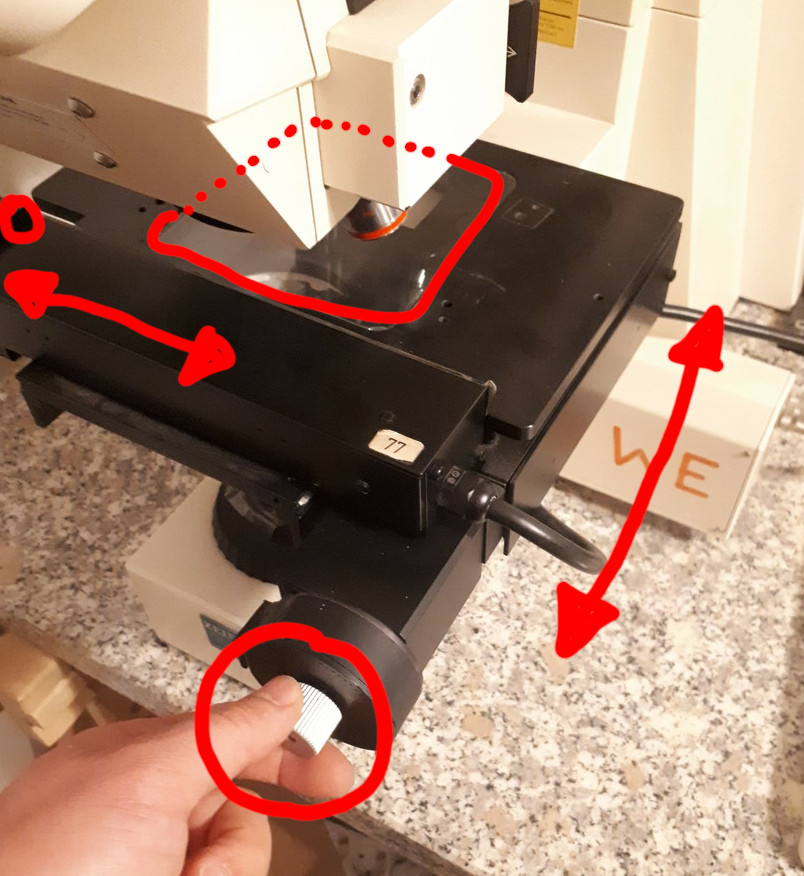
Using the 'coarse' drive (outer ring) focus control on left hand side, move the table down. Make sure there is enough space for the objective you want to use, plus your sample, plus a safety gap.
Make sure you have enough space before switching lenses, if unsure lower the table further.
You can readjust the focus anytime, you can break an objective only once.
If collision is imminent immediatley press the "RESET" button on the computer in the rack. This will immediatley stop the revolver.
-
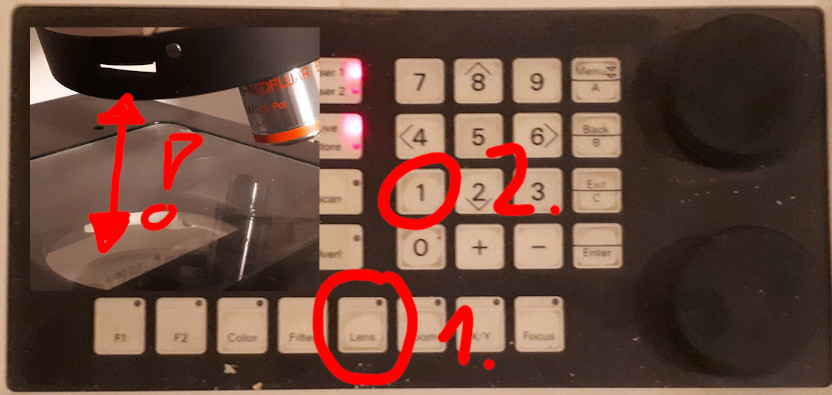
In this step the objective revolver will move on its own, this increases the risk of collision. Press lens followed by one, to change the current objective to the red 10x one.
-
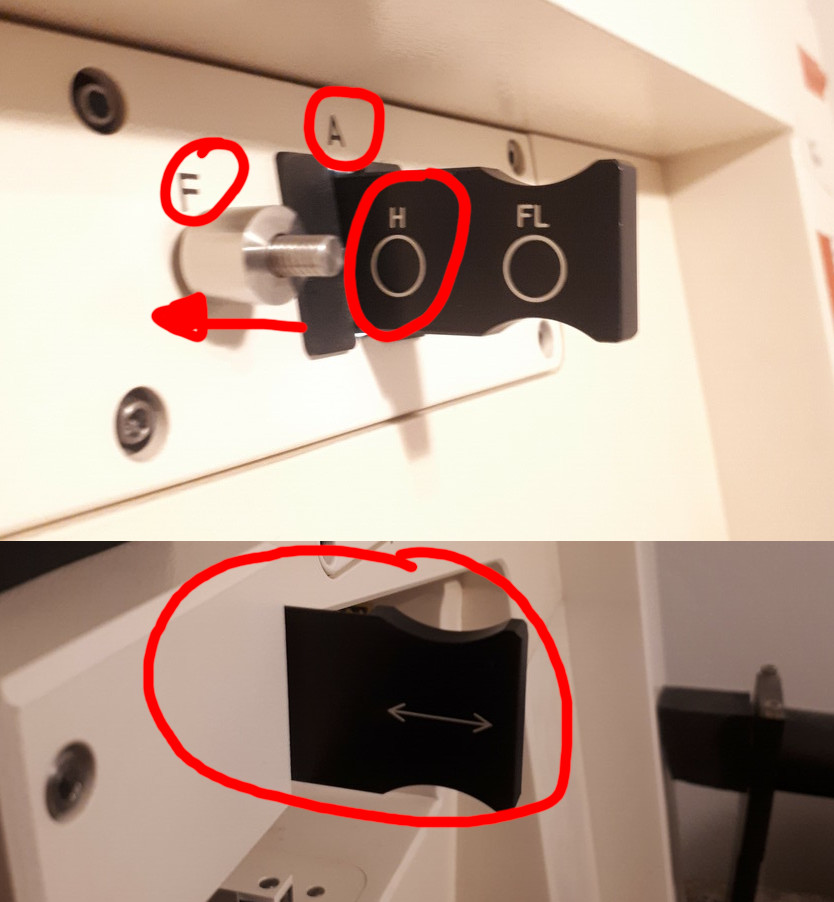
Make sure to set slider A to H 'large circle', knob F all the way in and "<-->" pulled out so it is not hidden.
-
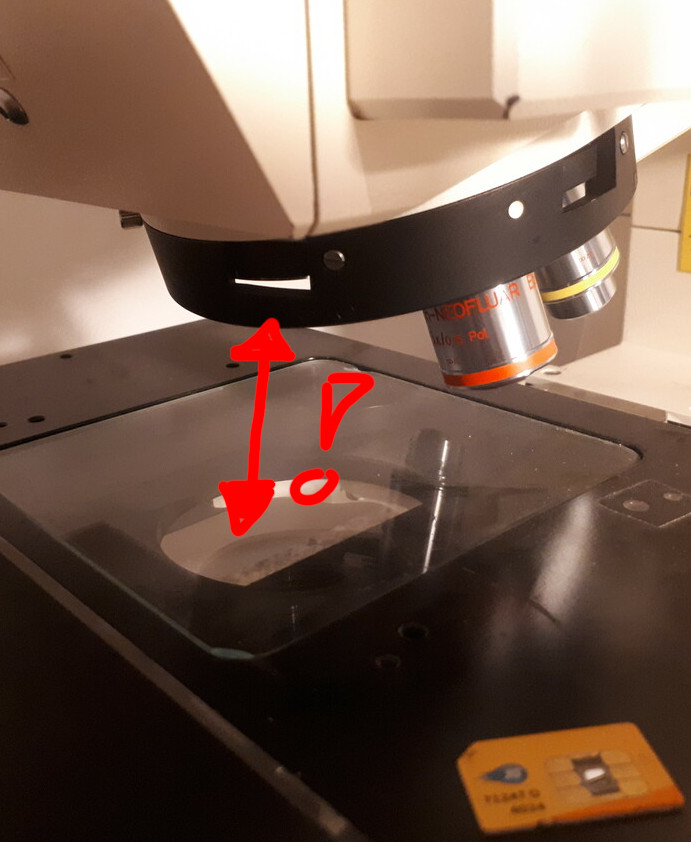
Place your sample on the glass in the middle of the light spot. Use both front and left silver knobs on the table assembly to adjust the table/sample position if desired.
-
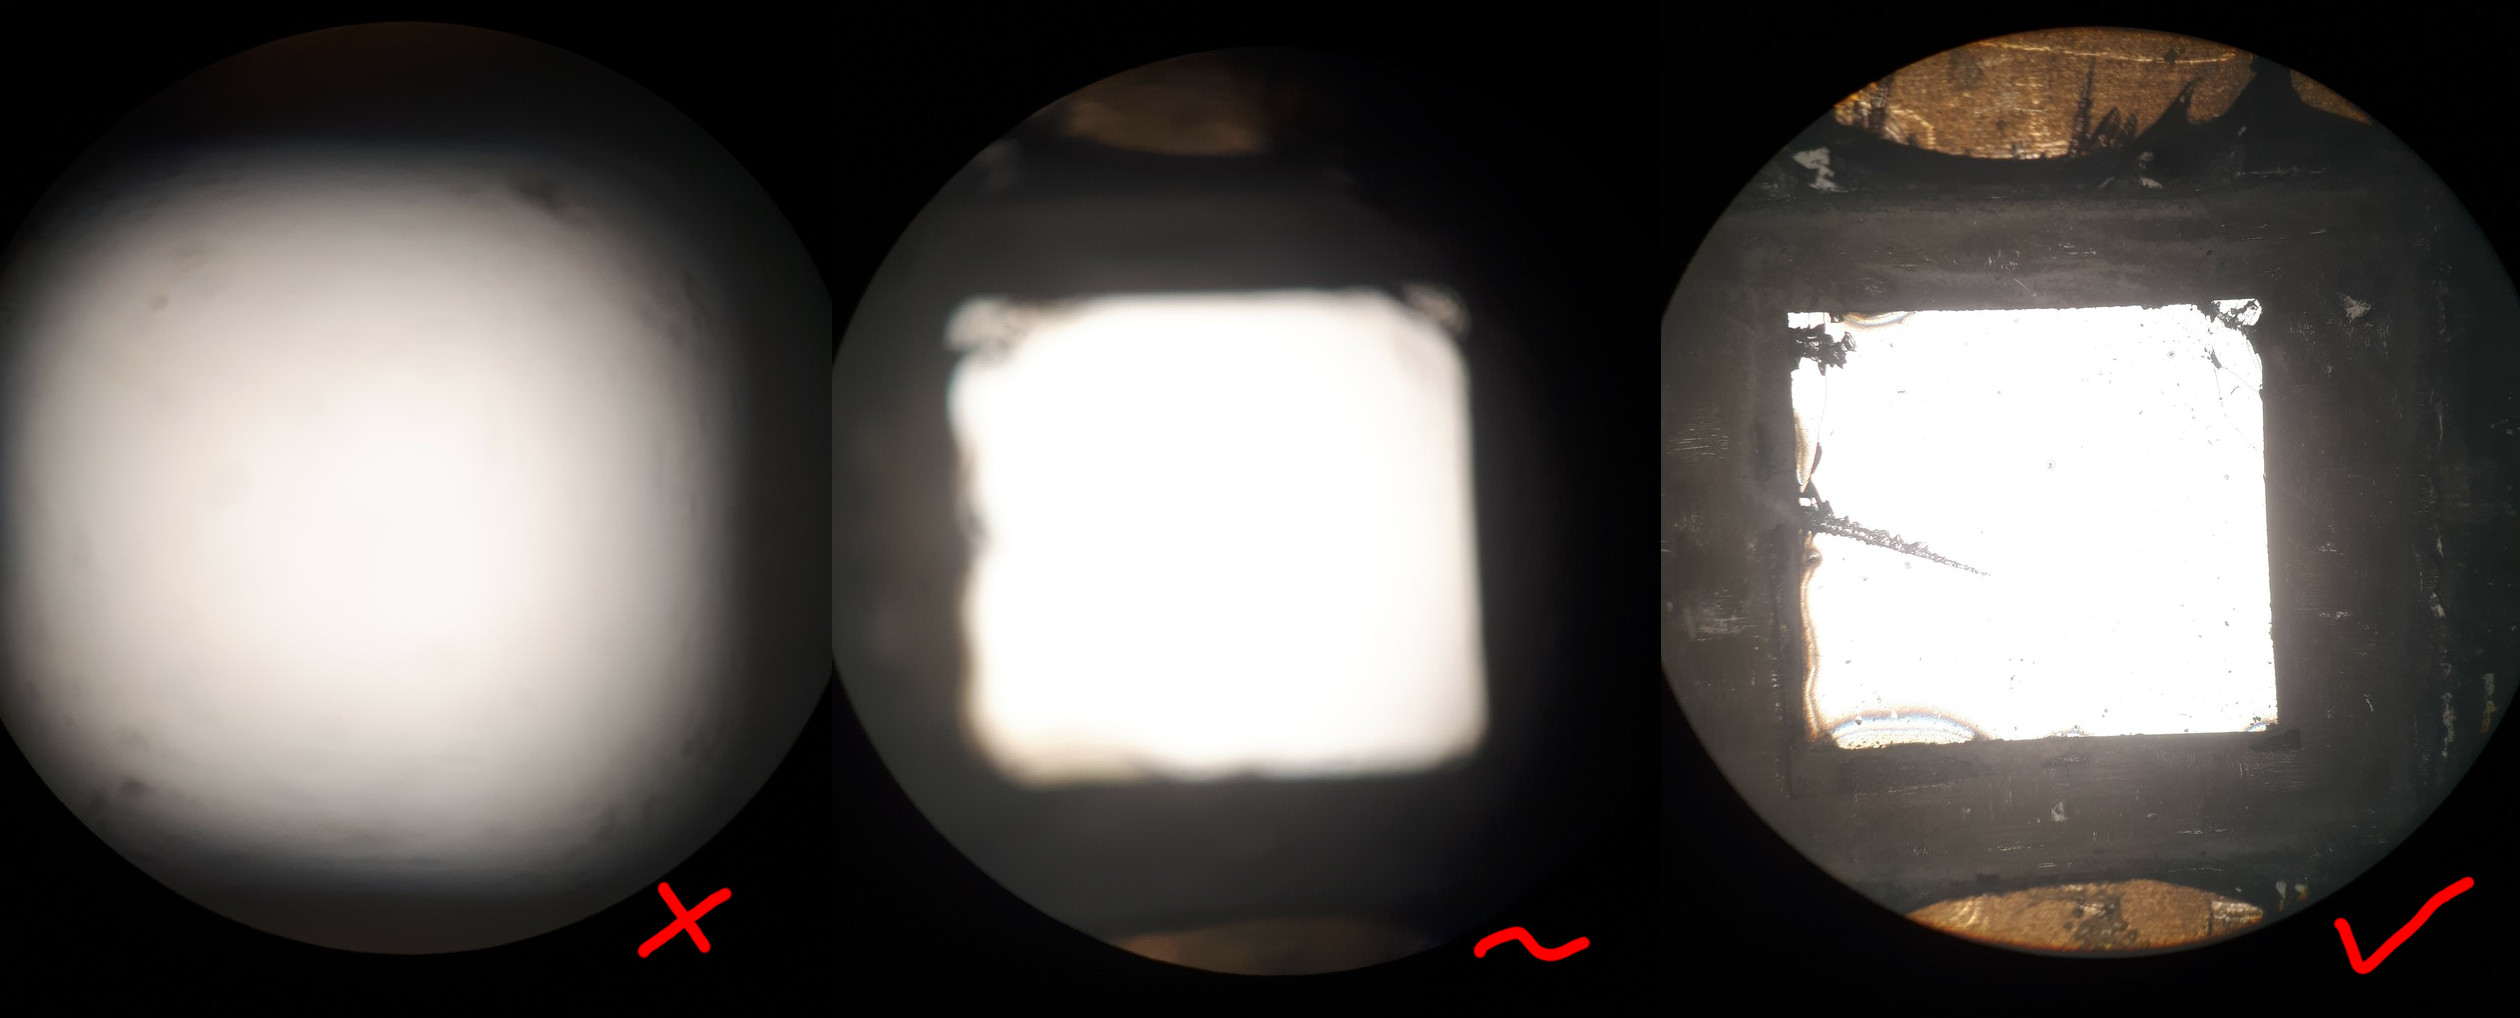
Move the 'coarse' drive (outer ring) focus control on left hand side up until the light spot on the sample has a crisp outer edge. It should also start shrinking.
-
Remove the plastic protector from the eyepieces on the front of the microscope. Be careful to not also pull off the eyepieces by accident.
-
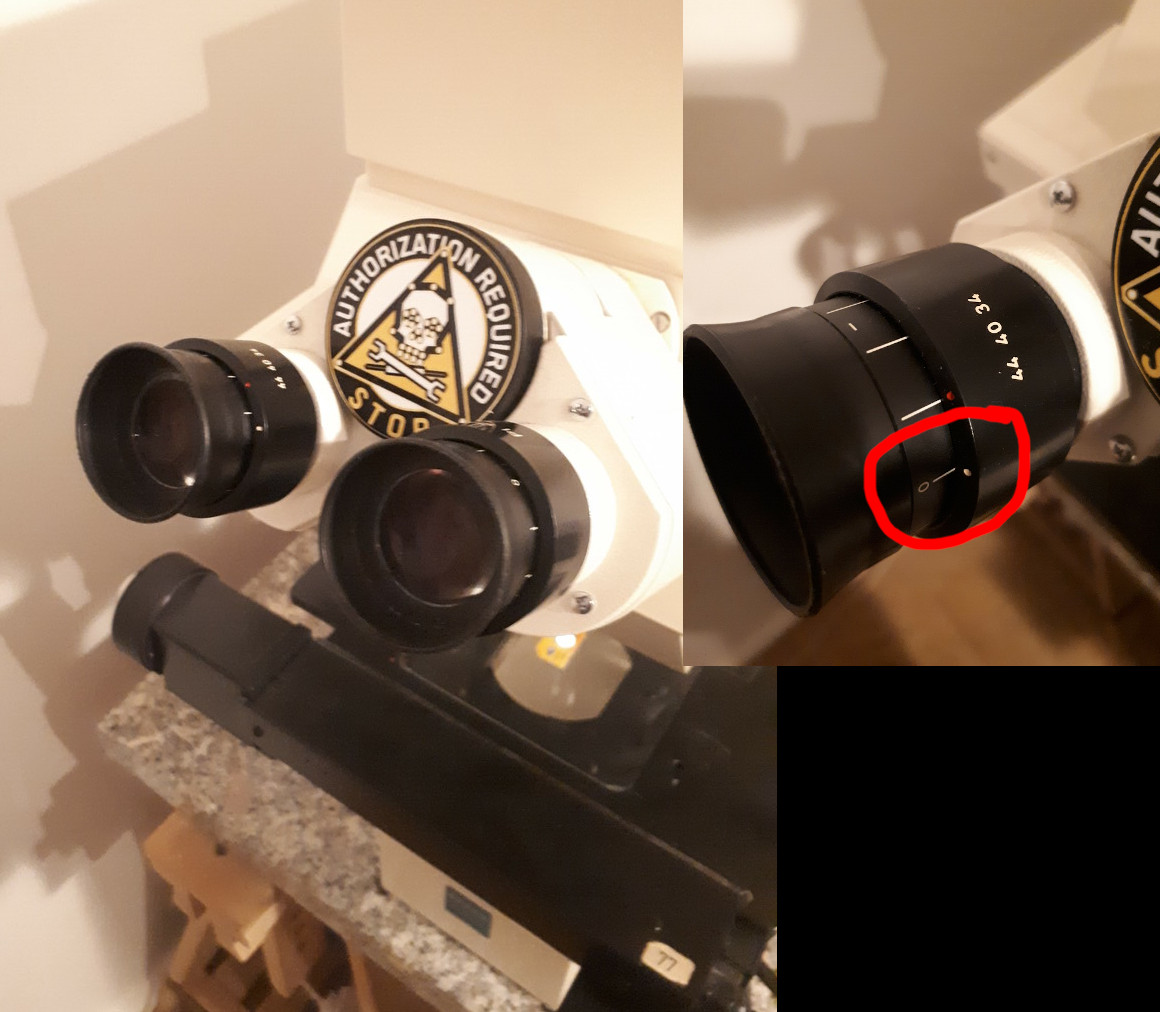
Unless you wear glasses make sure the white line marked "0" aligns with the white dot on each eyepiece. If you need glasses, set them to zero for now and adjust them once you have focused the sample in the following step.
Make sure you do not collied with the lens whilst adjusting focus.
Look up from the eyepiece regularly and check the gap between sample and objective.
-
Using the 'coarse' drive, focus the sample. When the sample is in focus, you can use the inner, 'fine' drive of the focus control for further fine tuning.
-
You can now explore the sample in conventional mode using both front and left silver knobs on the table assembly. If you push the "<-->" polarizer slider inwards, so it is hidden, you can also view the sample under polarized light.
-
If you wear glasses you can now adjust the eyepieces, assuming you focused it whilst wearing glasses. Look through the eyepieces without wearing your glasses and close one eye, turn the knob on the respective eyepiece until the image appears sharp. Now repeat this for your other eye.
-
If you want you can use the purple plastic ring in the small storage box to help you take photos through the eyepieces with your phone. Be careful not to take the eyepiece out by accident when removing the plastic ring again.
¶ Laser Microscopy Mode
-
Focus your sample with the 5x magnification objective according to the previous section.
-
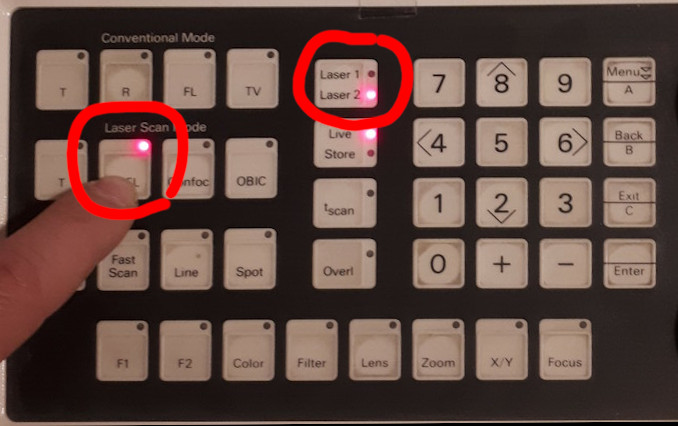
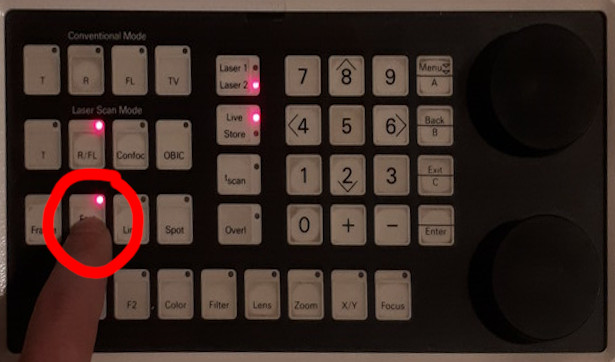
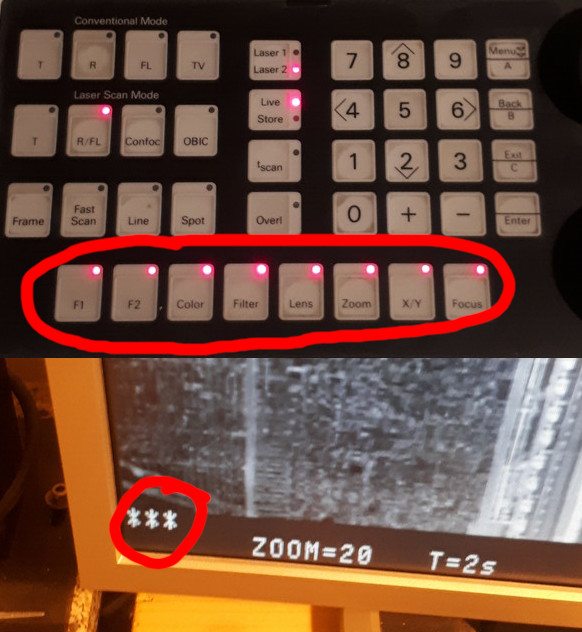
On the control panel switch the mode into "Laser Scan Mode" by pressing "R/FL" (reflection/flourescence), then switch the laser from "Laser 1" to "Laser 2" via the control panel.
-
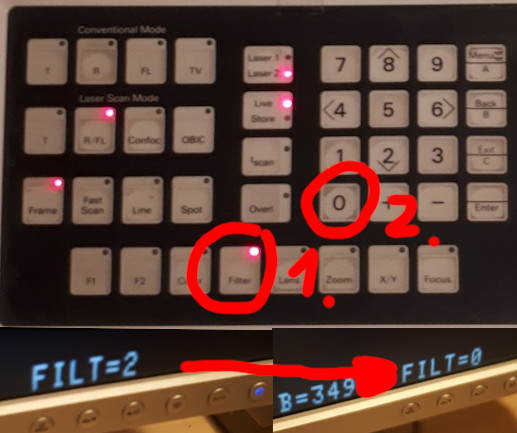
Press filter followed by 0 to set the laser attenuation filter to 0.
-
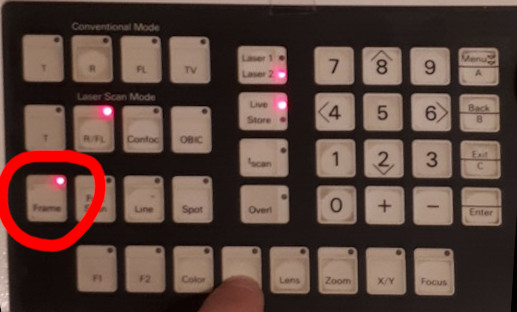
Press the 'Frame' button (Laser Scanning Mode section) to make sure frames are being captured live.
-
Pull out both detector attenuation filter plate holders until you can see two notches and remove the third blocking plate completely. This allows the reflected laser light to reach the detector.
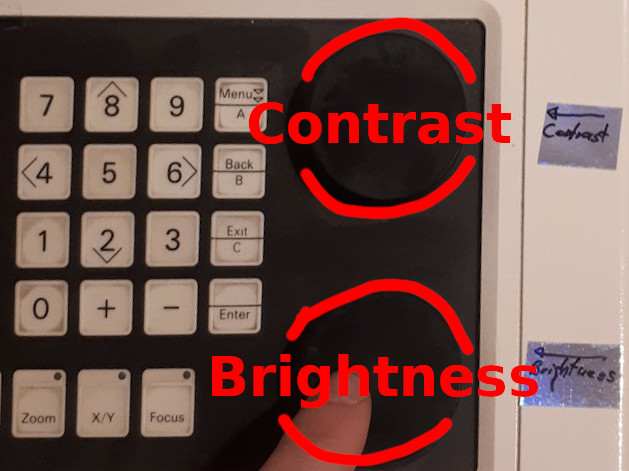
The value of brightness and contrast adjusted by the knobs on the control panel, have their value shown at the bottom of the screen: 'C=XXX' and 'B=XXX'.
Make sure you have enough space before adjusting the focus a lot, if unsure check.
You can adjust the focus anytime, you can break an objective only once.
-
Use the focus drive to improve the image while adjusting the brightness and contrast to get the best picture.
-
If you want, you can also use 'fast scan' for focusing to only scan a smaller middle section of the frame with decreased resolution. This will give you a much faster frame rate.
-
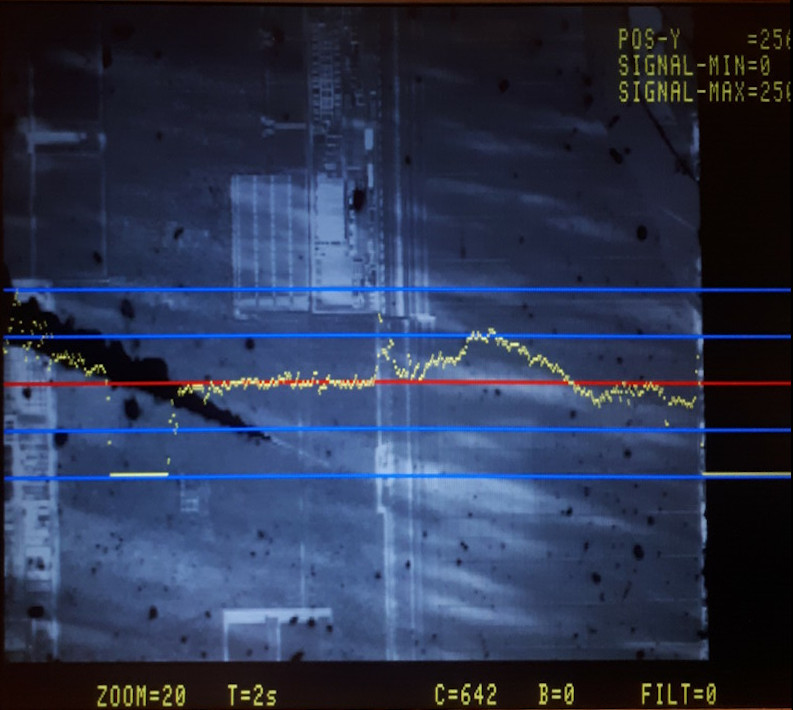
The recommended option for focusing is using line mode. Press the 'Line' button on the control panel under 'Laser Scan Mode', the sytem will only show you the values for a single (red) line on the image (similar to an oscilloscope trace). You will see the brightness signal live in yellow. The vertical axis is the brightness signal and the horizontal axis is the y position along the red line in the frame.
-
Try to align the peak of the signal between the top two blue lines and the minimum between the bottom two. Use brightness (moves signal up/down, offset) and contrast (stretches signal vertically, gain) to accomnplish this. Afterwards press frame mode to see the whole image frame again.
-
If the yellow line is peaking/maximal even with brightness at zero, insert a laser attenuation filter again by pressing the "Filter" button followed by "1" or "2" to insert the filter.
¶ Higher Magnification
Changing to higher magnification objectives can potentially break them if you are not careful and collide one with the sample. Please read this section carefully and ask for help if needed.
Please always make sure you have enough room for the next lens. Keep in mind the next lens will always be closer to your sample than the previous one. Also think about edges or wires on your sample. If in doubt, lower the table 2 cm or so, switch the lens, and while carefully watching the distance try to find the focus again. Get help if feeling insecure. We've all been there and it is scary the first few times, so no shame.
-
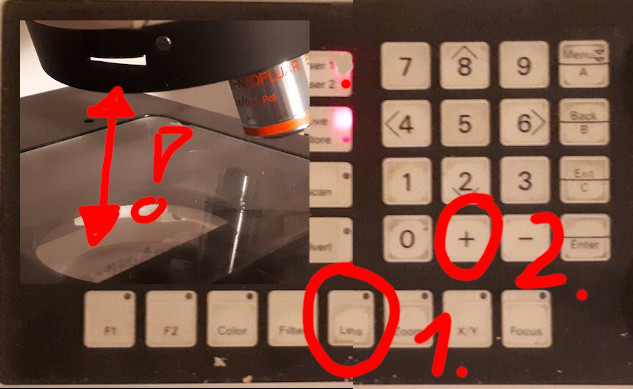
Make sure there is enough space for the next lens. If there is not, lower the sample table first.
-
Select the next larger lens by pressing lens and then plus. The lens turret will rotate to the next lens. You can go back to the previous lens by pressing lens and then minus.
-
Use any of the methods described in the previous sections (frame scan, quick scan, line scan) to adjust the focus and brightness/contrast as well as filter for the new lens.
-
When microscoping with infrared through the silicon of microchips keep in mind that the silicon-air surface will come in focus first when you raise the sample table. If you are interested in the transistors and not the surface, you have to raise the focusing table a tiny bit more until you can see the transistor structures inside the silicon.
¶ Saving Your Images
- Make sure you have a nice image on the screen. If you want to stop the scanning process during this process, you can press the Live/Store button on the control panel to stop the scanner after the frame.
¶ Option A: Using the Windows Laptop
-
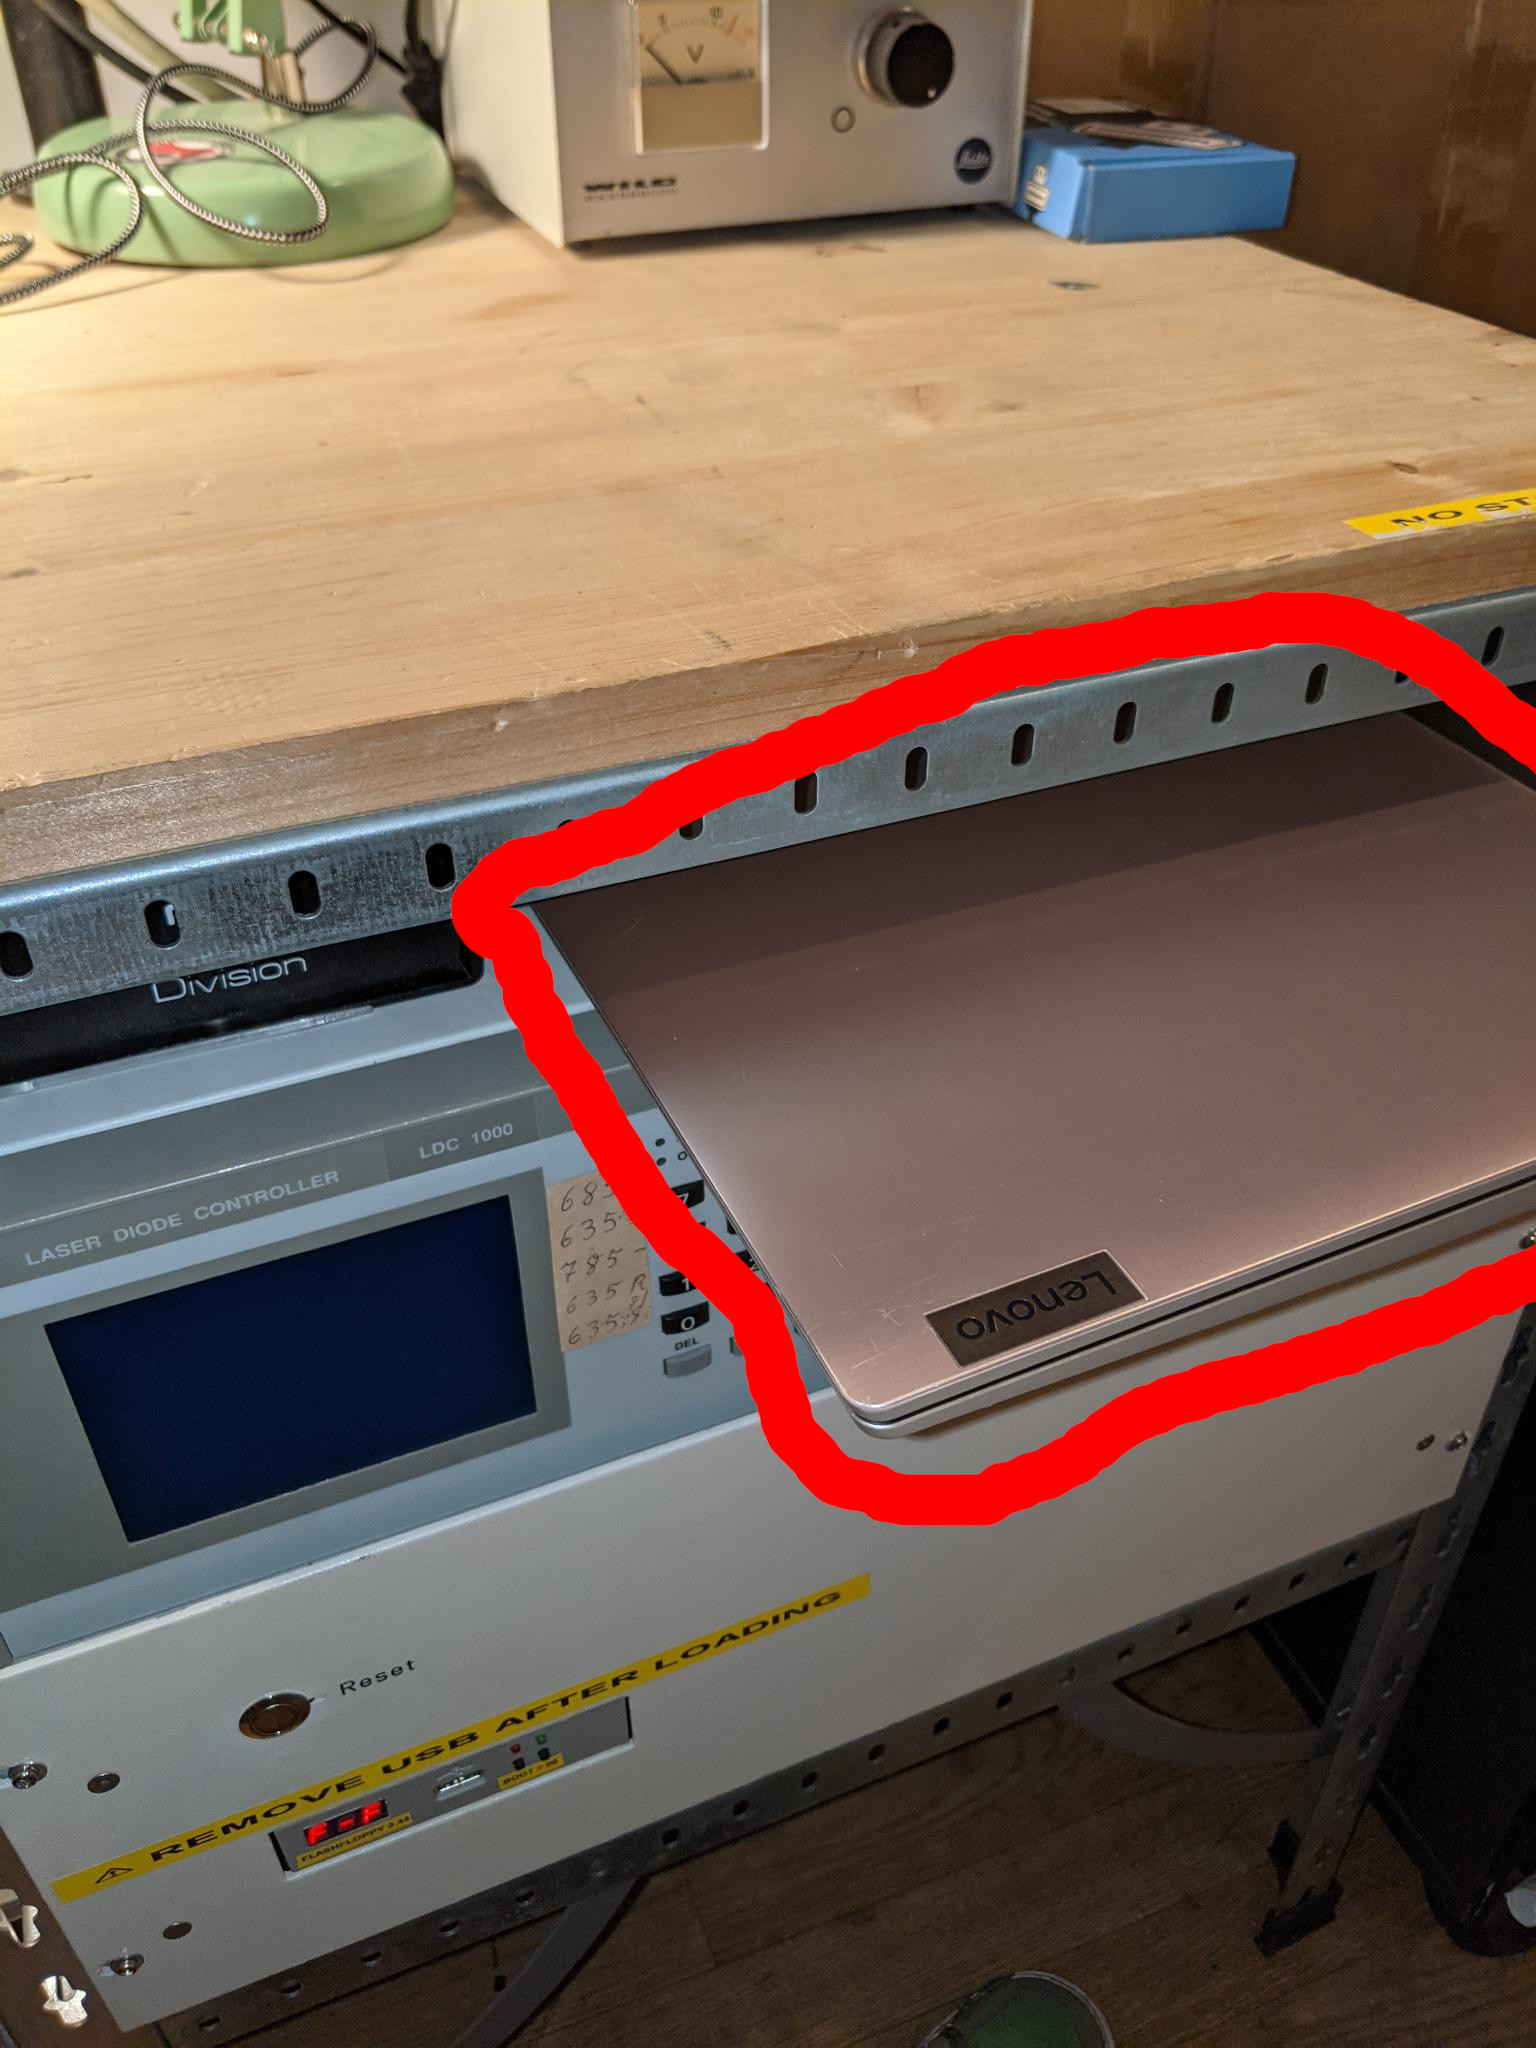
Get the windows laptop from the rack.
-
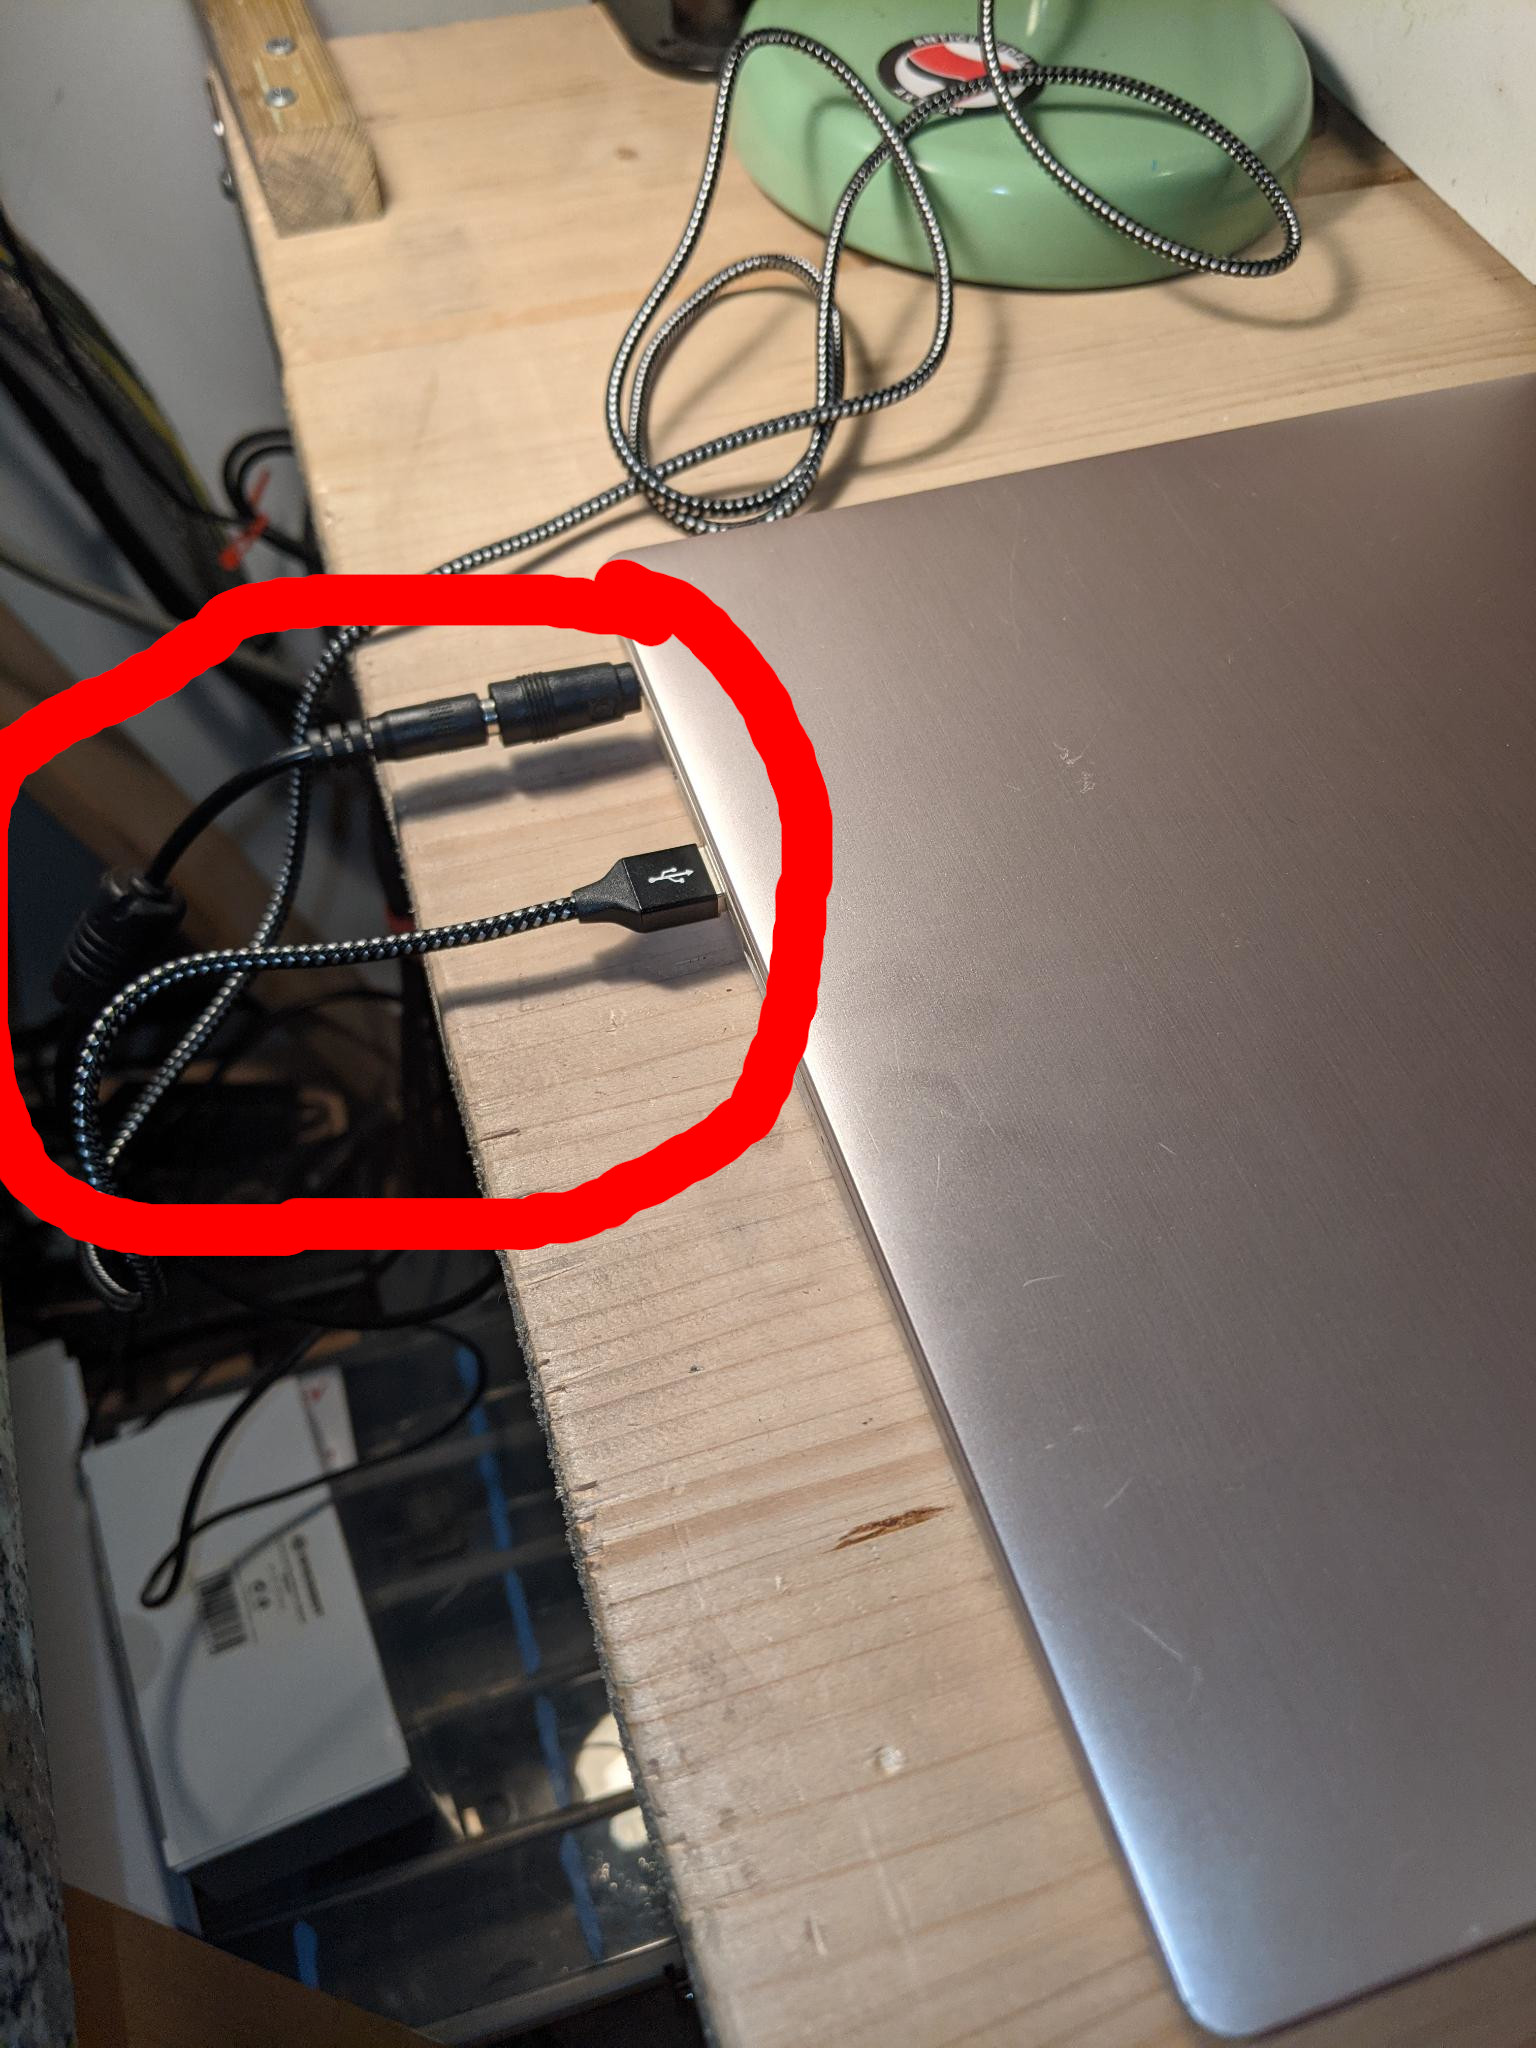
Connect laptop power and USB cable coming from the microscope.
-
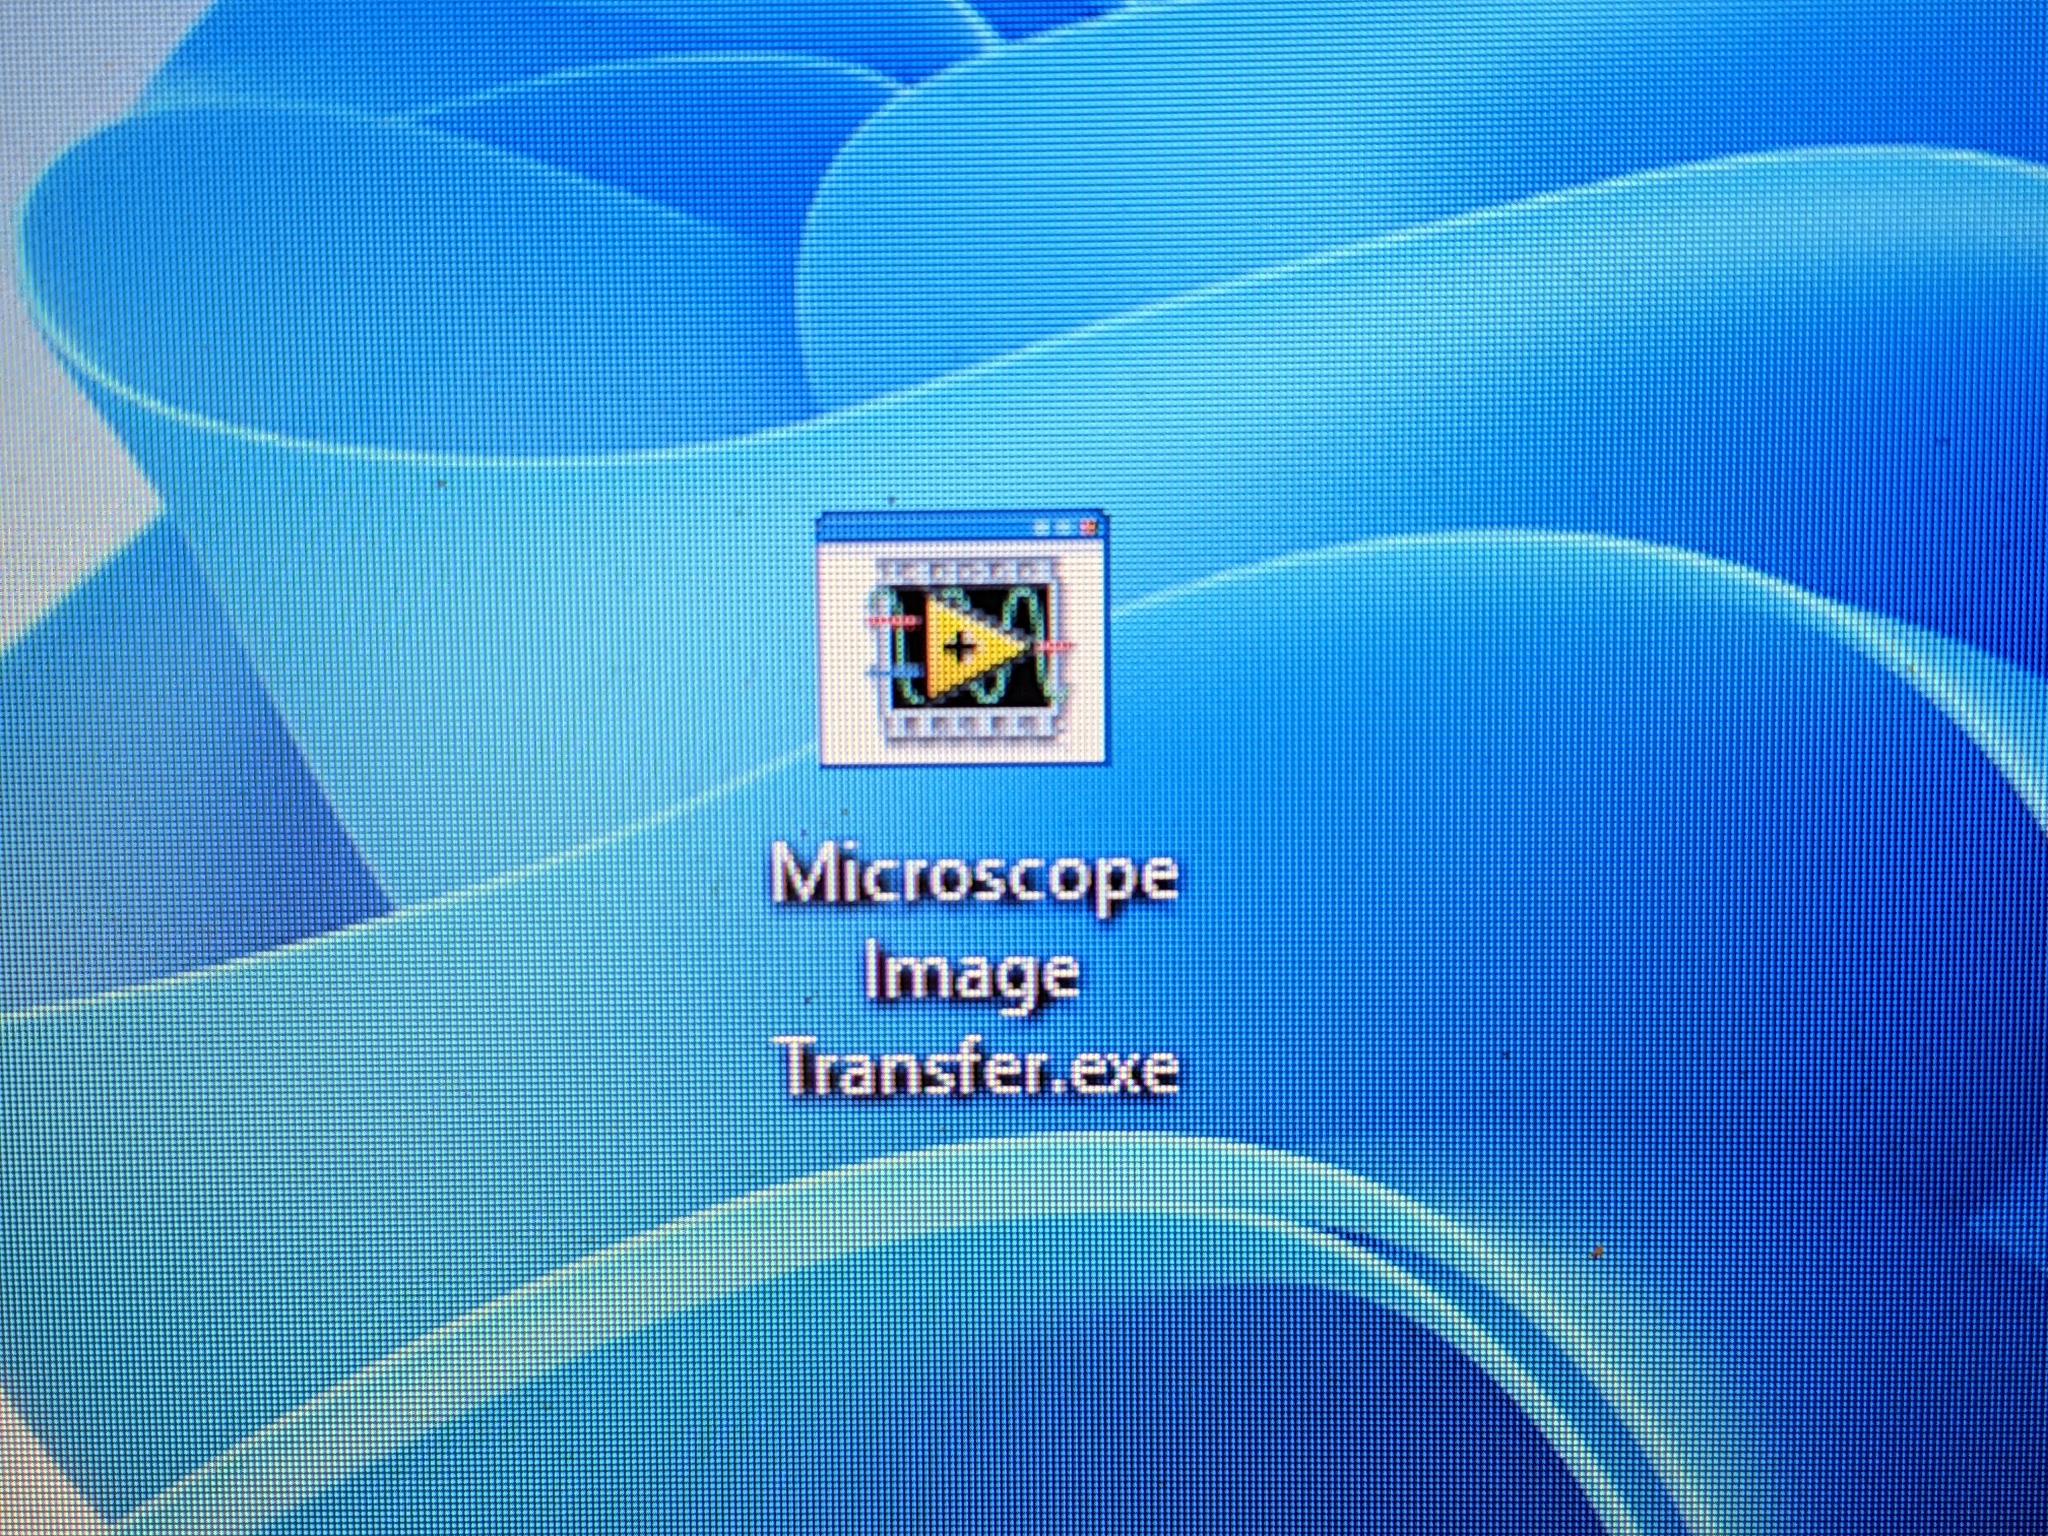
Boot the laptop and start the image transfer application.

-
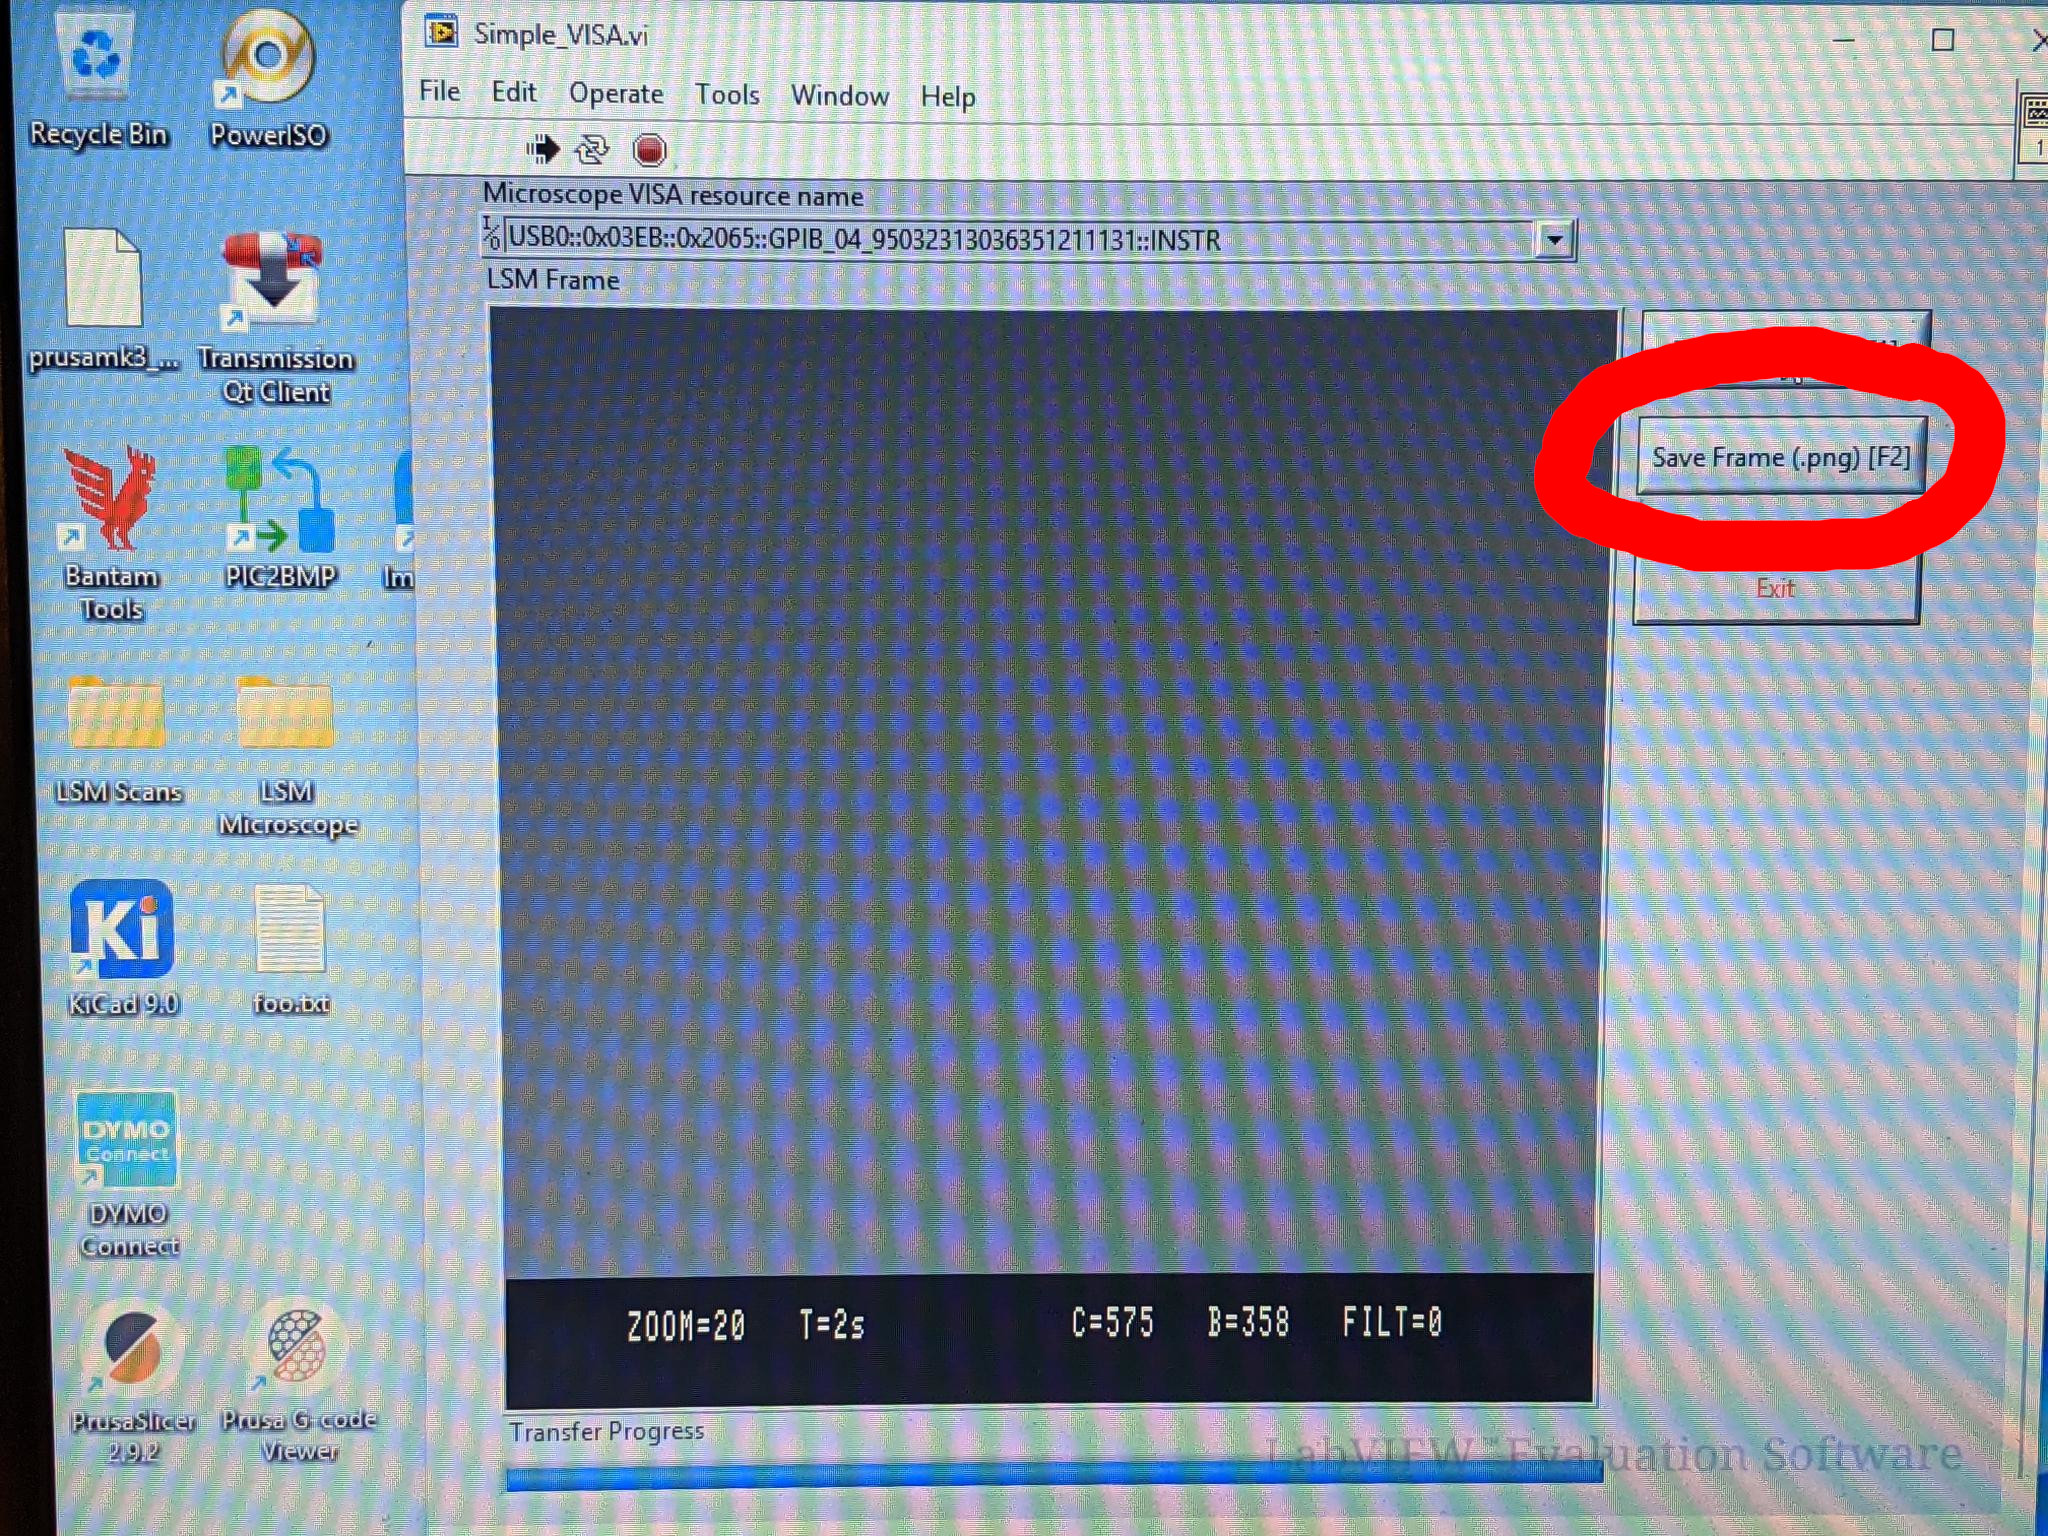
Click "transfer frame" and wait for the transfer to finish.
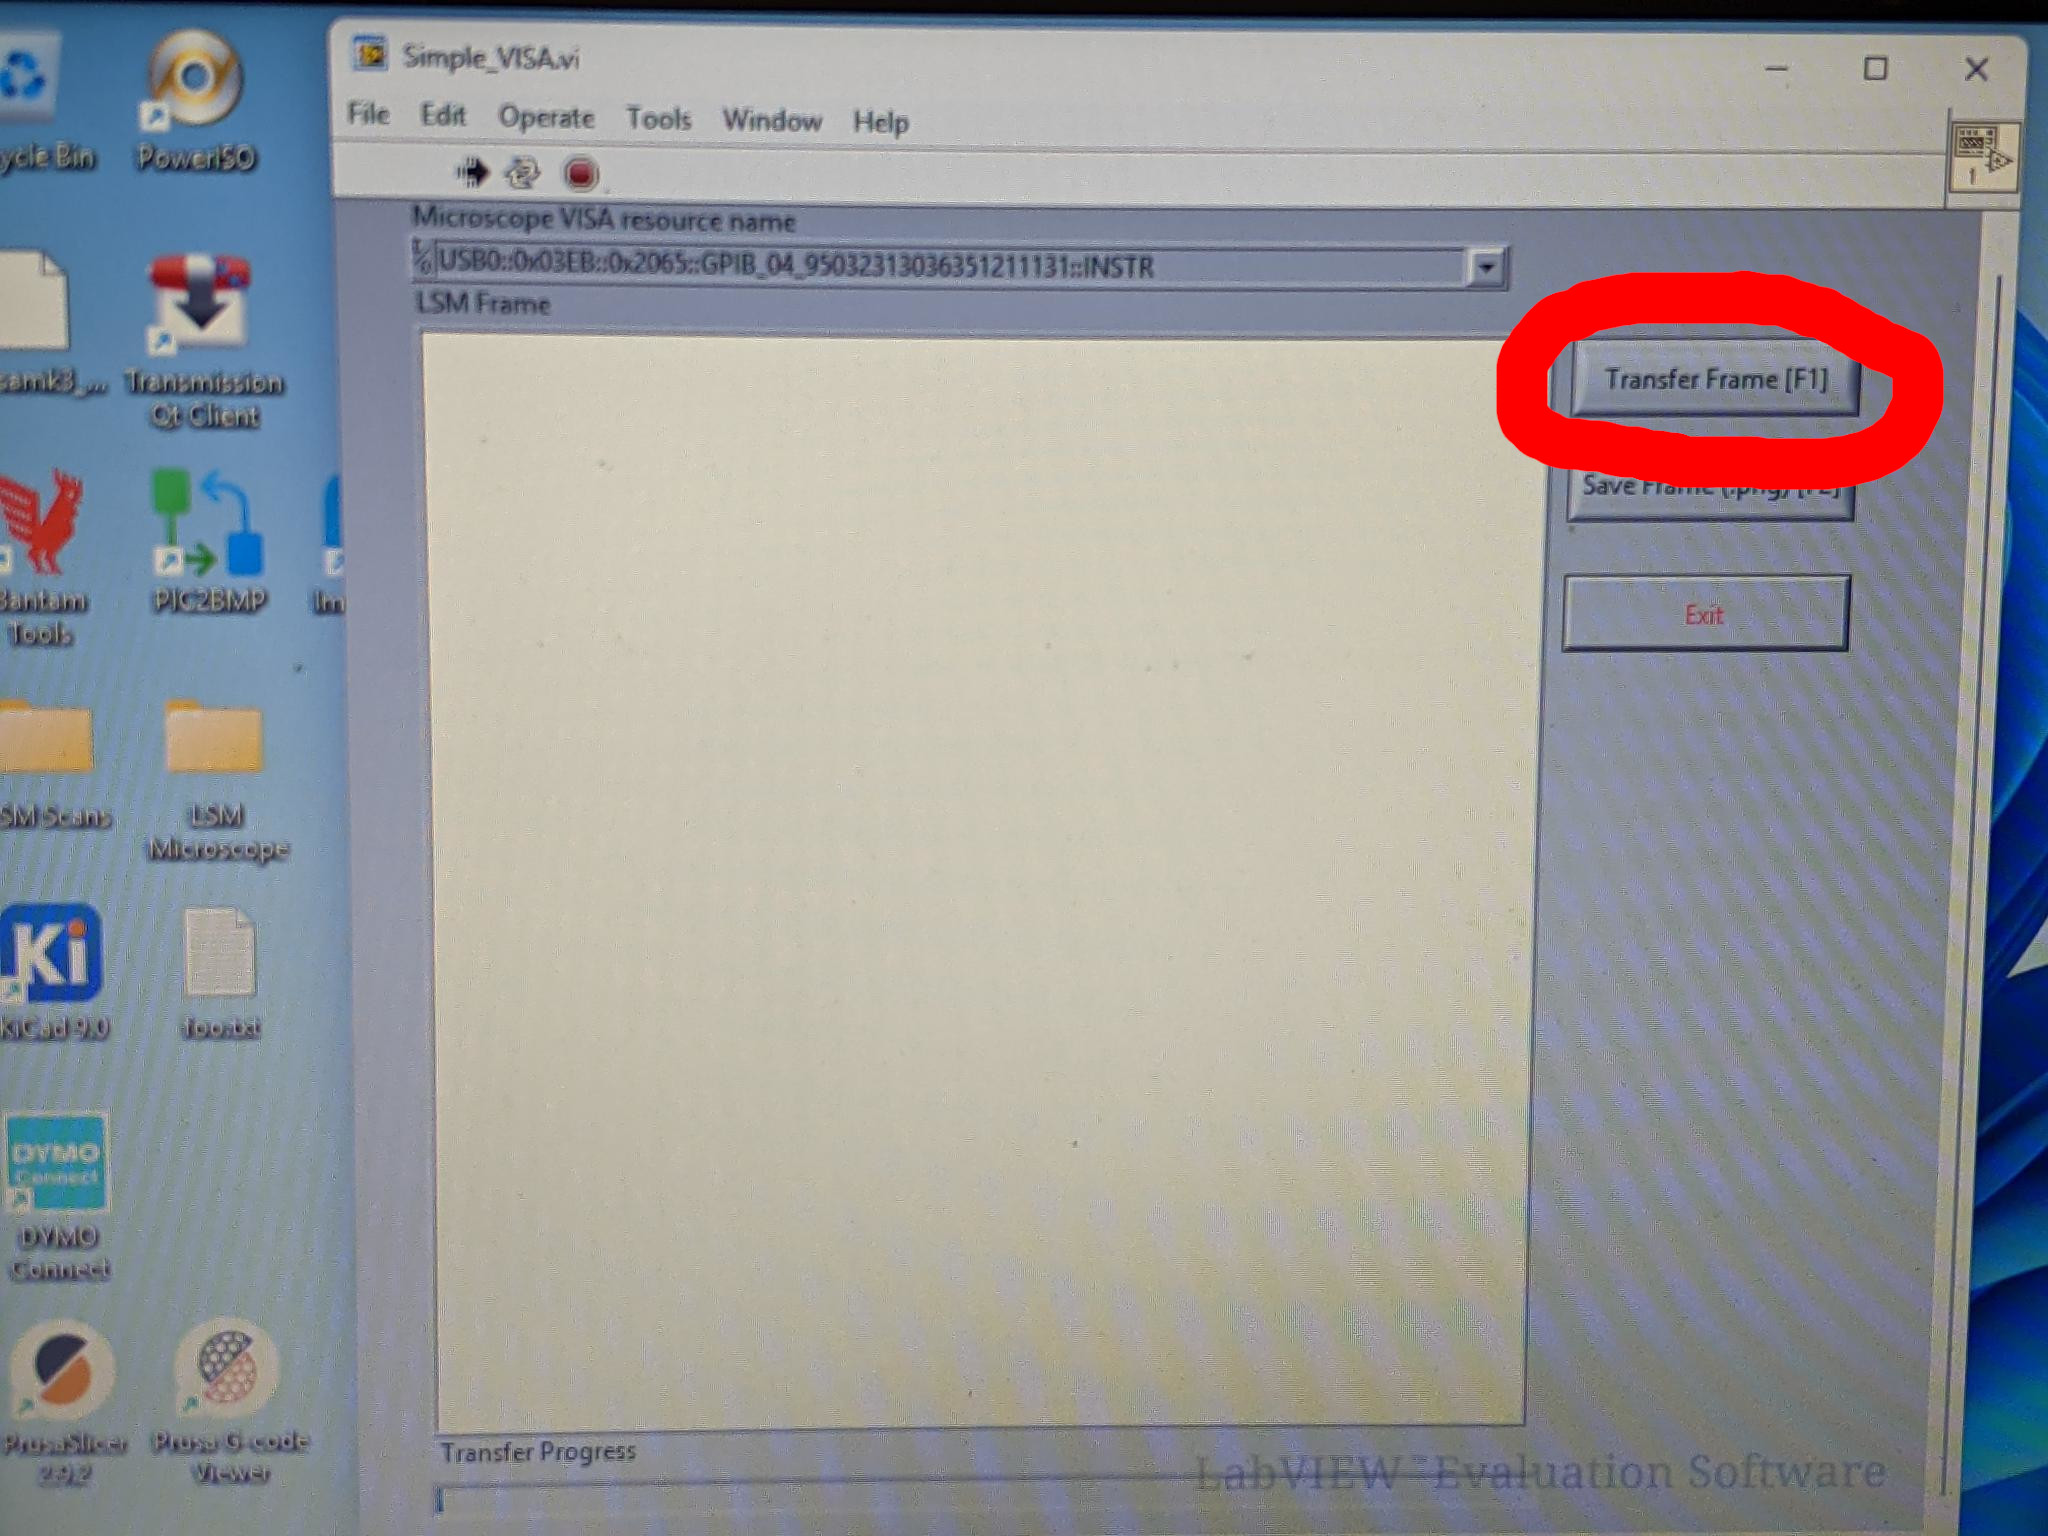
-
Click "save frame" to save a PNG file of the frame somewhere.
-
Open the .png and adore your results. You did great. 🥳
-
When done, make sure to shutdown the laptop and hide it back in the rack.
¶ Option B: Using USB Stick + Floppy Emulator
-
Find the image transfer USB labeled "microscope transfer".
-
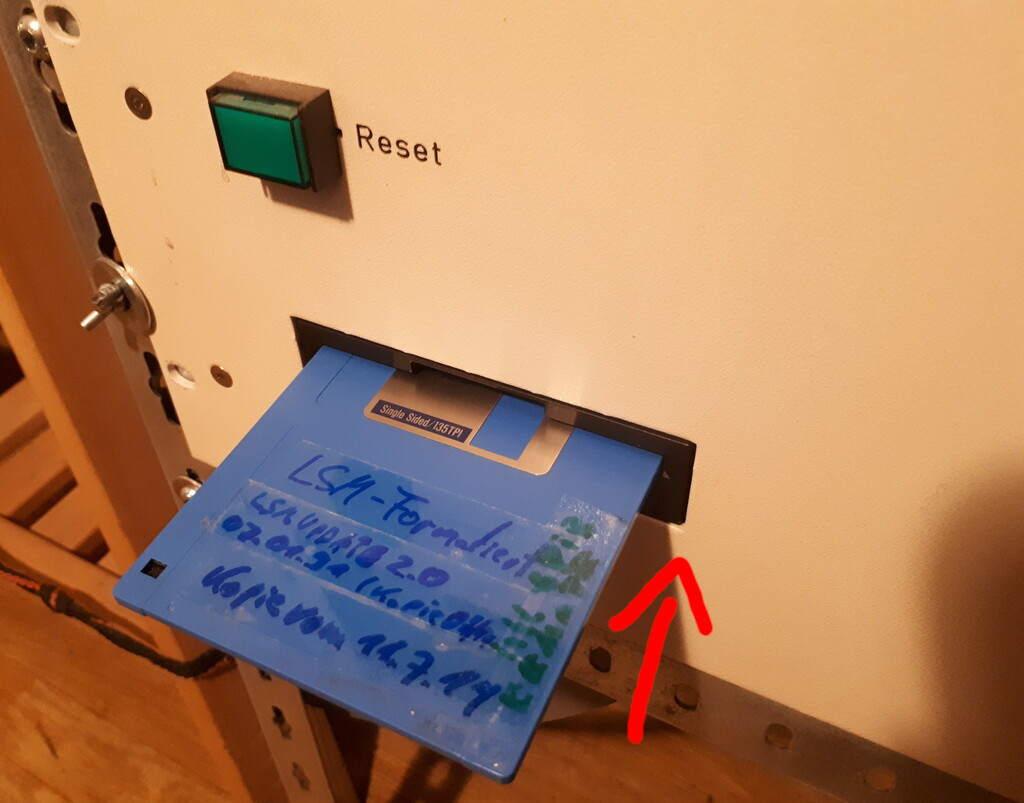
Remove the USB boot stick from the floppy emulator and insert the transfer USB stick.
-
Select the virtual floppy number you want to use using the buttons on the floppy emulator. You might need to wait a bit for the floppy number to appear after floppy activity, e.g. "000", "001", etc.
-
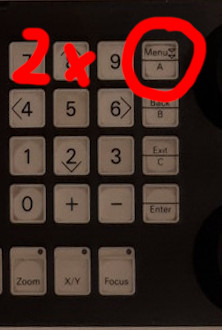
Press the 'menu' button 2 times
-
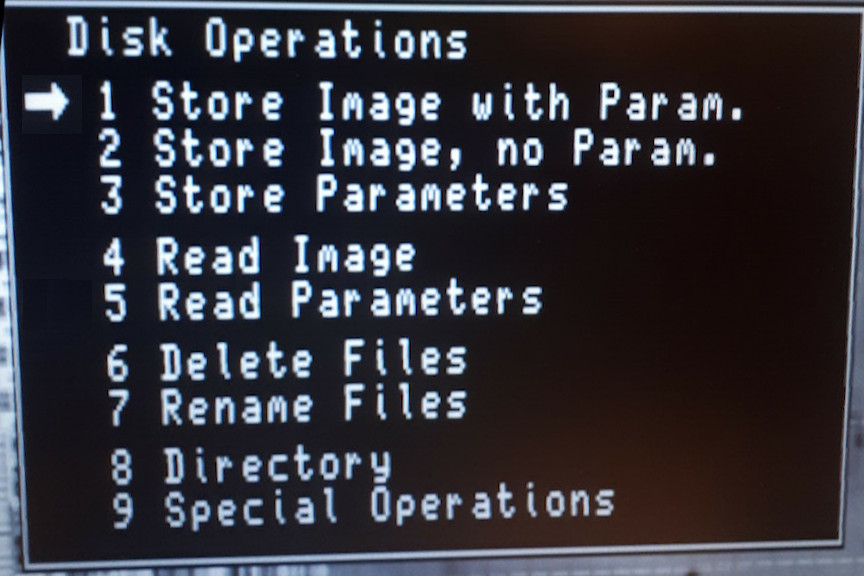
Press 1 to select "disk operations".

-
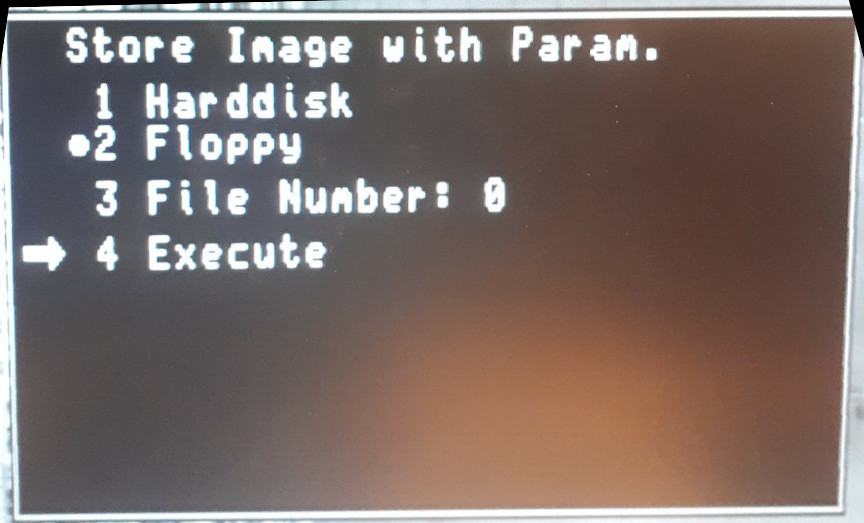
Press 1 to select "store image with parameters" and then press 2 to select floppy (probably already selected).
-
If this is not your first picture, increase the floppy number on the floppy emulator via the buttons.
-
Press 3 to select file number. The floppy holds only one image anyway so make sure that the "File Number" always is zero. Only change floppy numbers at the emulator.
-
Press 4 to execute the store operation and write to the floppy. Write down the virtual floppy number. You will need it later to copy the correct file.
-
If you get an confirmation dialog about overwriting the previous file, make sure you selected the correct floppy number, and confirm. Overwriting files is normal as there will still be old files of other people on the virtual floppy and overwriting is easier than formating.
-
If you see an error about "Disk Full" at the bottom right corner, you are trying to write multiple files on a single virtual floppy. Make sure you selected the correct floppy number at the emulator and the file number in the menu is set to 0.
-
During copy, you will see three stars in the lower left corner of the screen and the LEDs on the control panel will light up. Wait until copying is finished and the stars disappear and the LEDs go off. Also the sector number on the floppy emulator will increase while writing.
-
Remove the transfer USB stick from the microscope and connect it to your PC.
-
Copy the virtual floppy images matching the numbers you wrote down earlier when saving. Afterwards remove the USB stick and put it back.
DO NOT delete the virtual floppy files from the stick. It is the same as throwing the virtual floppy away. There need to be a lot of virtual floppy images on the USB so they are ready to be used in the emulator. The emulator does not create floppy images by itself.
-
Mount the virtual floppy images using:
mkdir vf0
sudo mount ./virtual_floppy_000.img ./vf0/ -o loop -
Copy the 0.PIC file to your PC. Repeat the mount process for every virtual floppy and save the 0.PIC files somewhere.
-
Alternatively, if you cannot mount virtual floppys on your PC, you can also copy the virtual floppy files directly. The conversion tool you will use later can handle them but will add a bit of garbage data at the beginning of the images.
-
Install the pic2bmp conversion tool from https://wiki.x-hain.de/en/Branches/LaserLab/Microscope/Resources on your PC.
¶ Conversion on Linux:
-
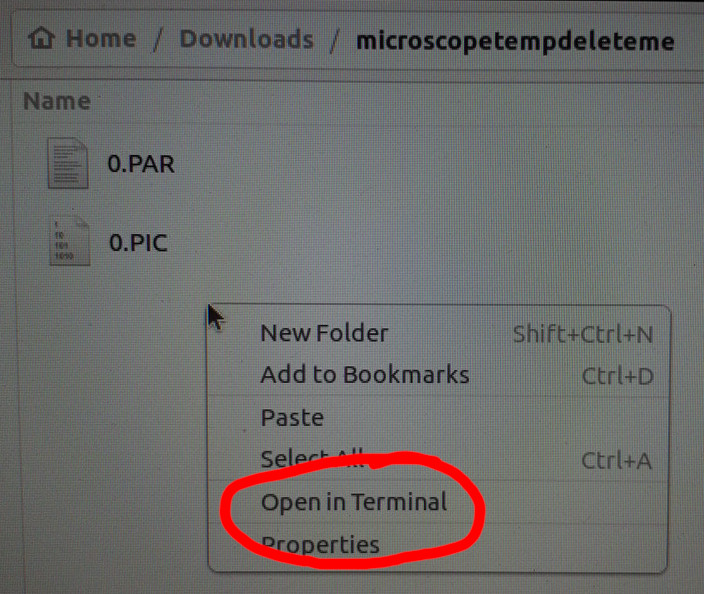
Right click in the folder you copied the files to and select "Open in Terminal". Don't do this on the floppy itself but in your folder with the copies.
-
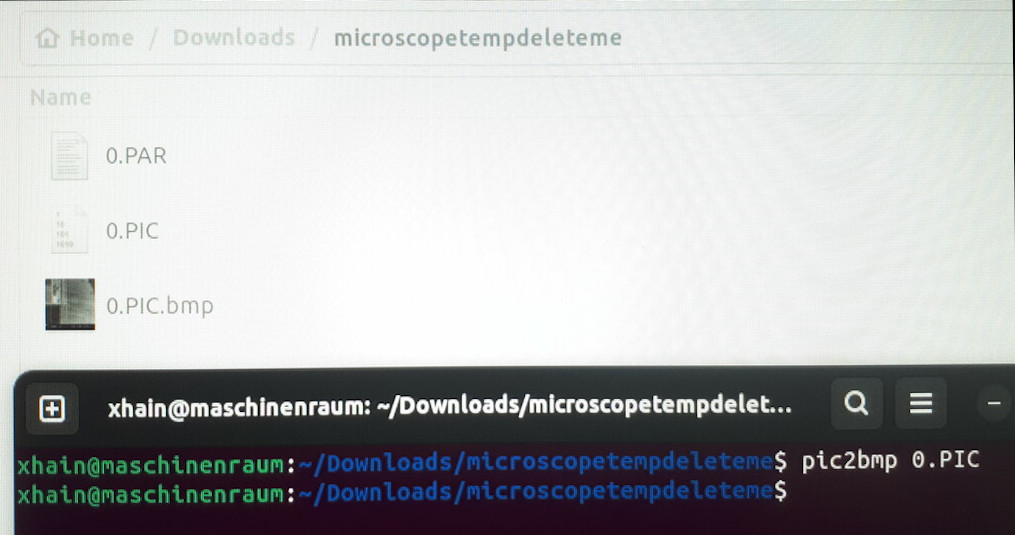
Enter in the terminal
pic2bmp 0.PIC(the file name may vary as you copied all the 0.PIC files from the virtual floppys somewhere. If you used the workaround with direct virtual floppy files, the filename will be virtual_floppy_xyz.img) to convert the image to a bmp format, and save it in the same folder.
¶ Conversion on Windows:
- Start the pic2bmp GUI application you installed, open the 0.pic files and click convert. If you used the workaround with direct virtual floppy files, the filename will be virtual_floppy_xyz.img. Repeat this with all your .PIC or .img files.
¶ After conversion:
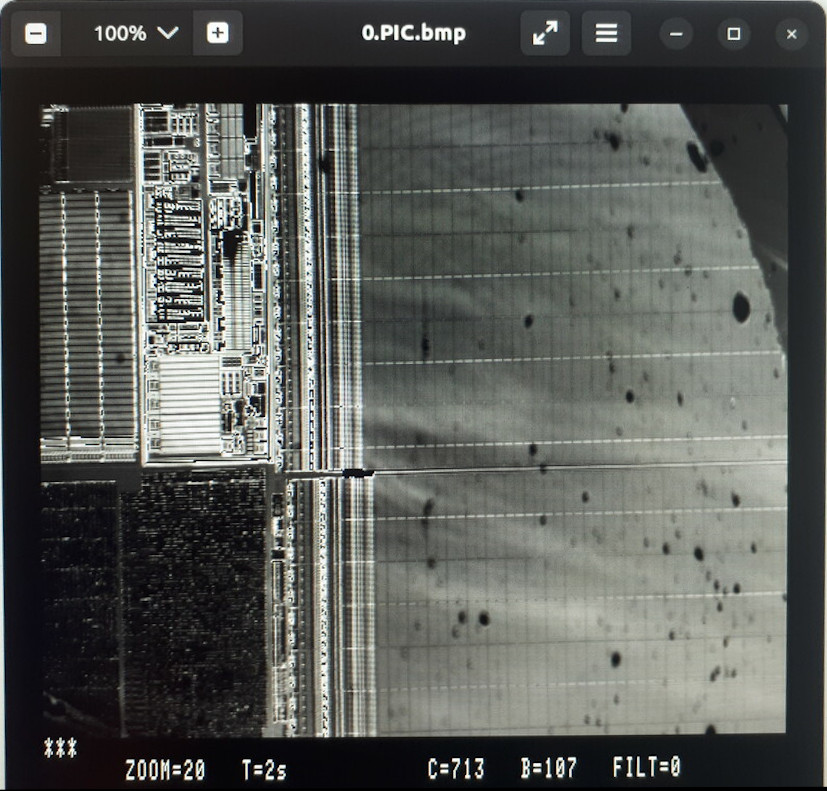
-
Open the .bmp and adore your results. You did great. 🥳
-
When done, make sure to put the USB stick(s) back in the box.
¶ Finishing Your Session
-
Put all detector attenuators all the way in.
-
Switch off the laser.
-
Move the sample table down until you can safely remove your sample and all other things. If you used an xHain sample please put it back.
-
Make sure you have space for changing the lenses back. Press the 'lens' button , followed by the 'minus' button to change the lens. Repeat until the empty lens slot is selected.
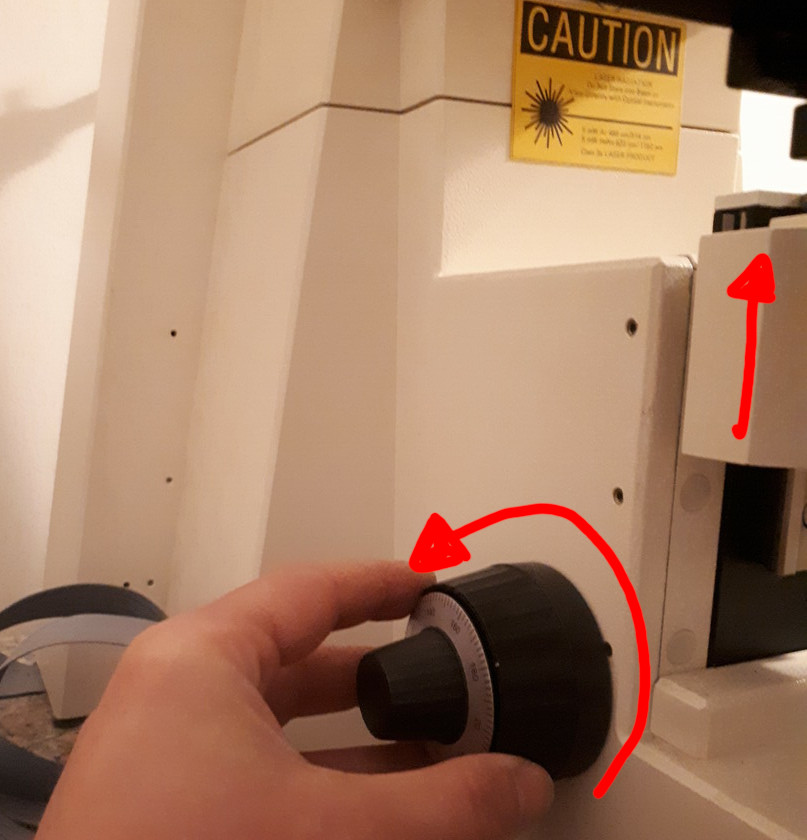
-
Use the front silver knob to return the glass table all the way back, until you feel it gets a bit harder to move. See image for final position.
-
Remove the purple photo helper adapter from the eyepiece if you have used it. Be careful not to take the eyepiece off by accident.
-
Put the silver/black protection cap back on the eyepieces.
-
Put the laser key, the laser detector card, and the smartphone photo helper (if you used it) back in the box and put the box back.
-
Turn off the main power switch on the extension cord below the table.
-
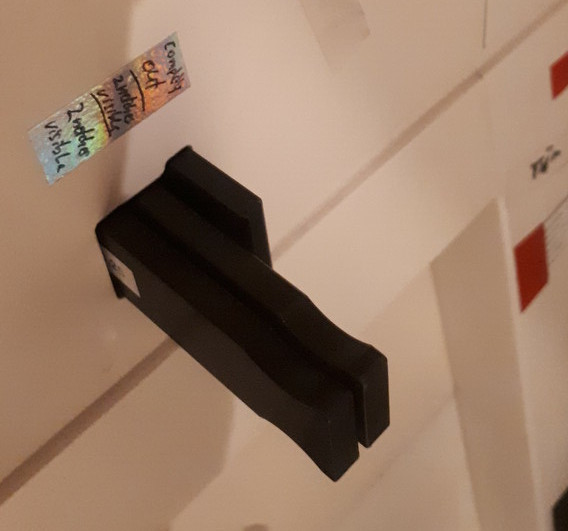
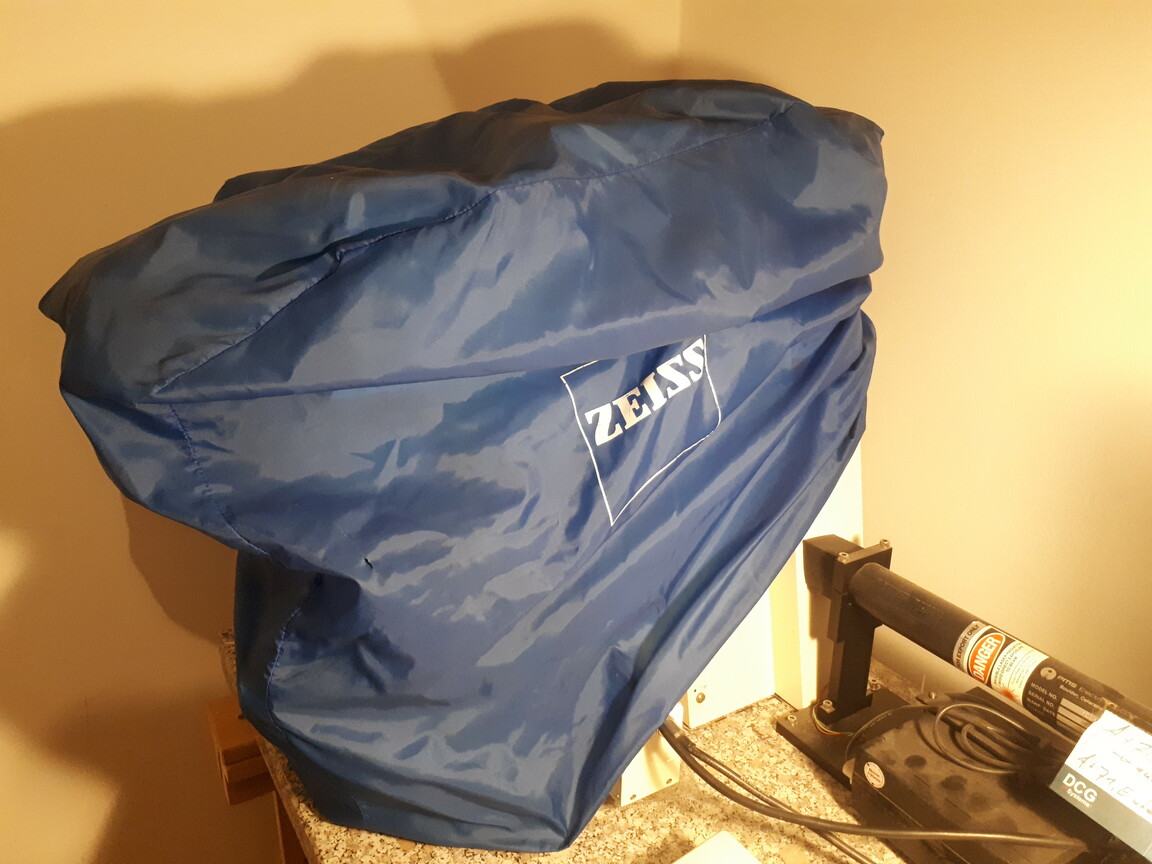
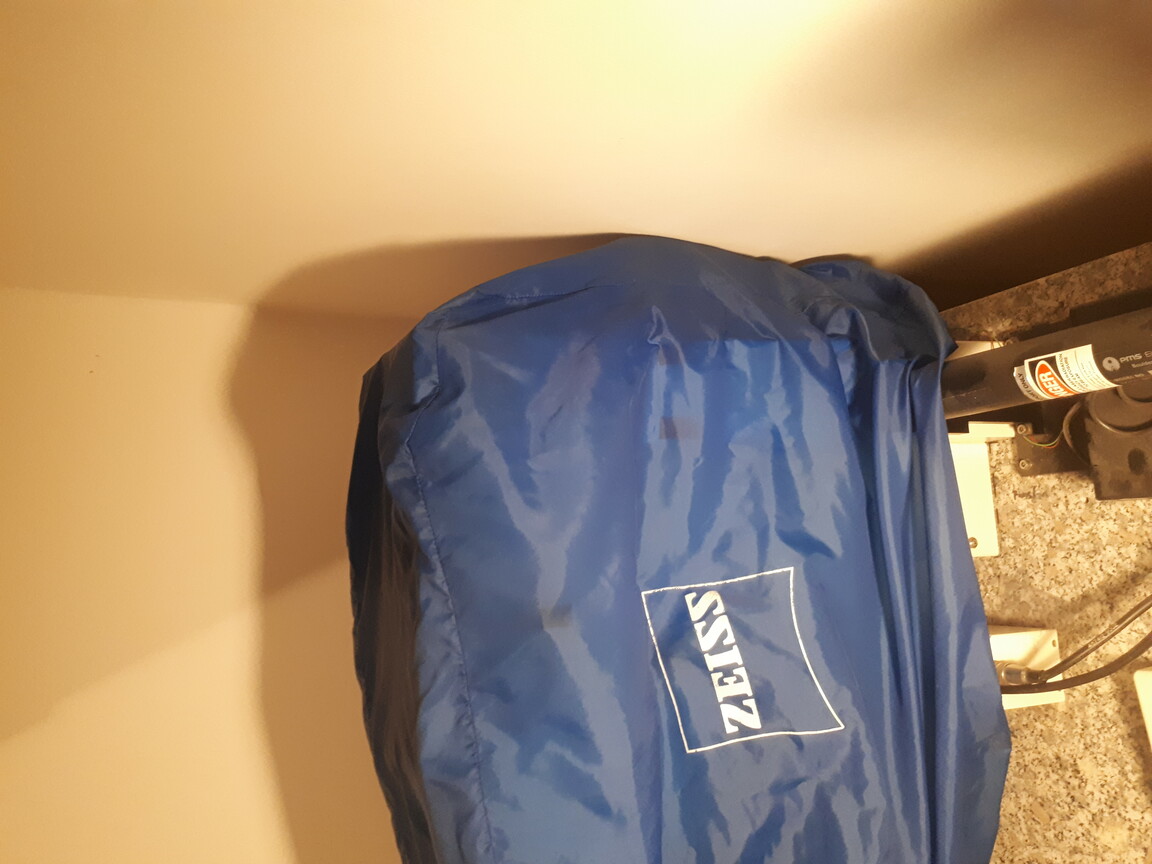
Put back the dust cover of the microscope. Make sure not to touch the lenses. It's easier if you start from the top and then to the back. Make sure it goes as low as possible, see images.
-
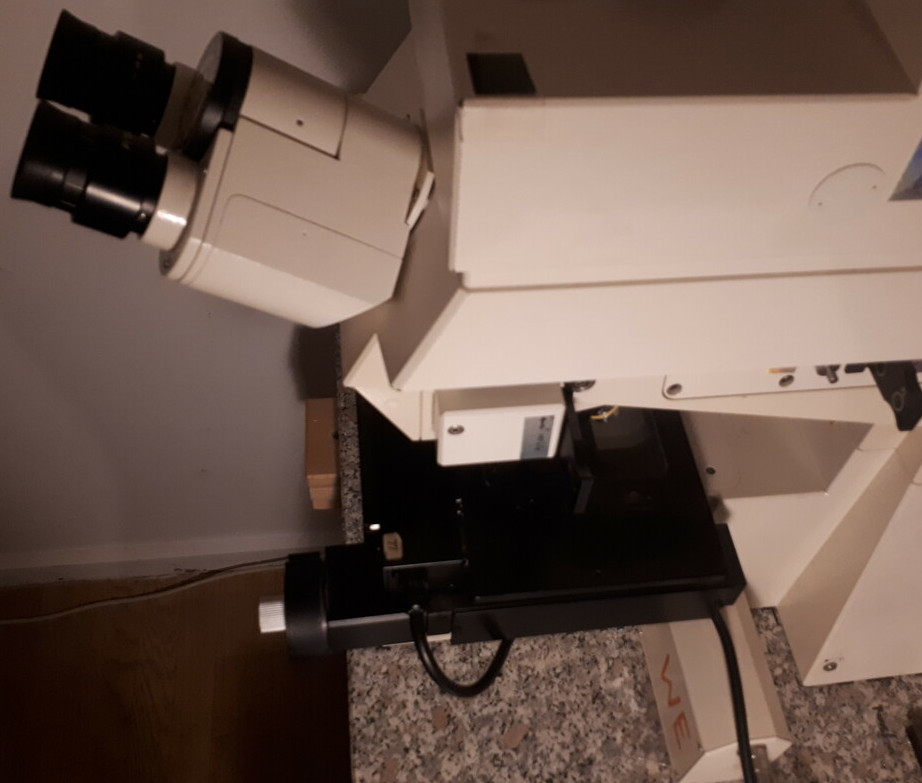
If the microscope looks all nice and tidy like in the following picture, get a cool beverage to celebrate your session. 🥳