¶ Reflow Oven Operation
If you want an introduction to be able to use the reflow oven please ask in the Matrix channel. Below serves just as a reminder.
This page is intended as a reminder and does NOT replace a personal introduction to the reflow oven.
DO NOT use the reflow oven without having received instructions and official permission from an authorized person.
¶ Machine Controls
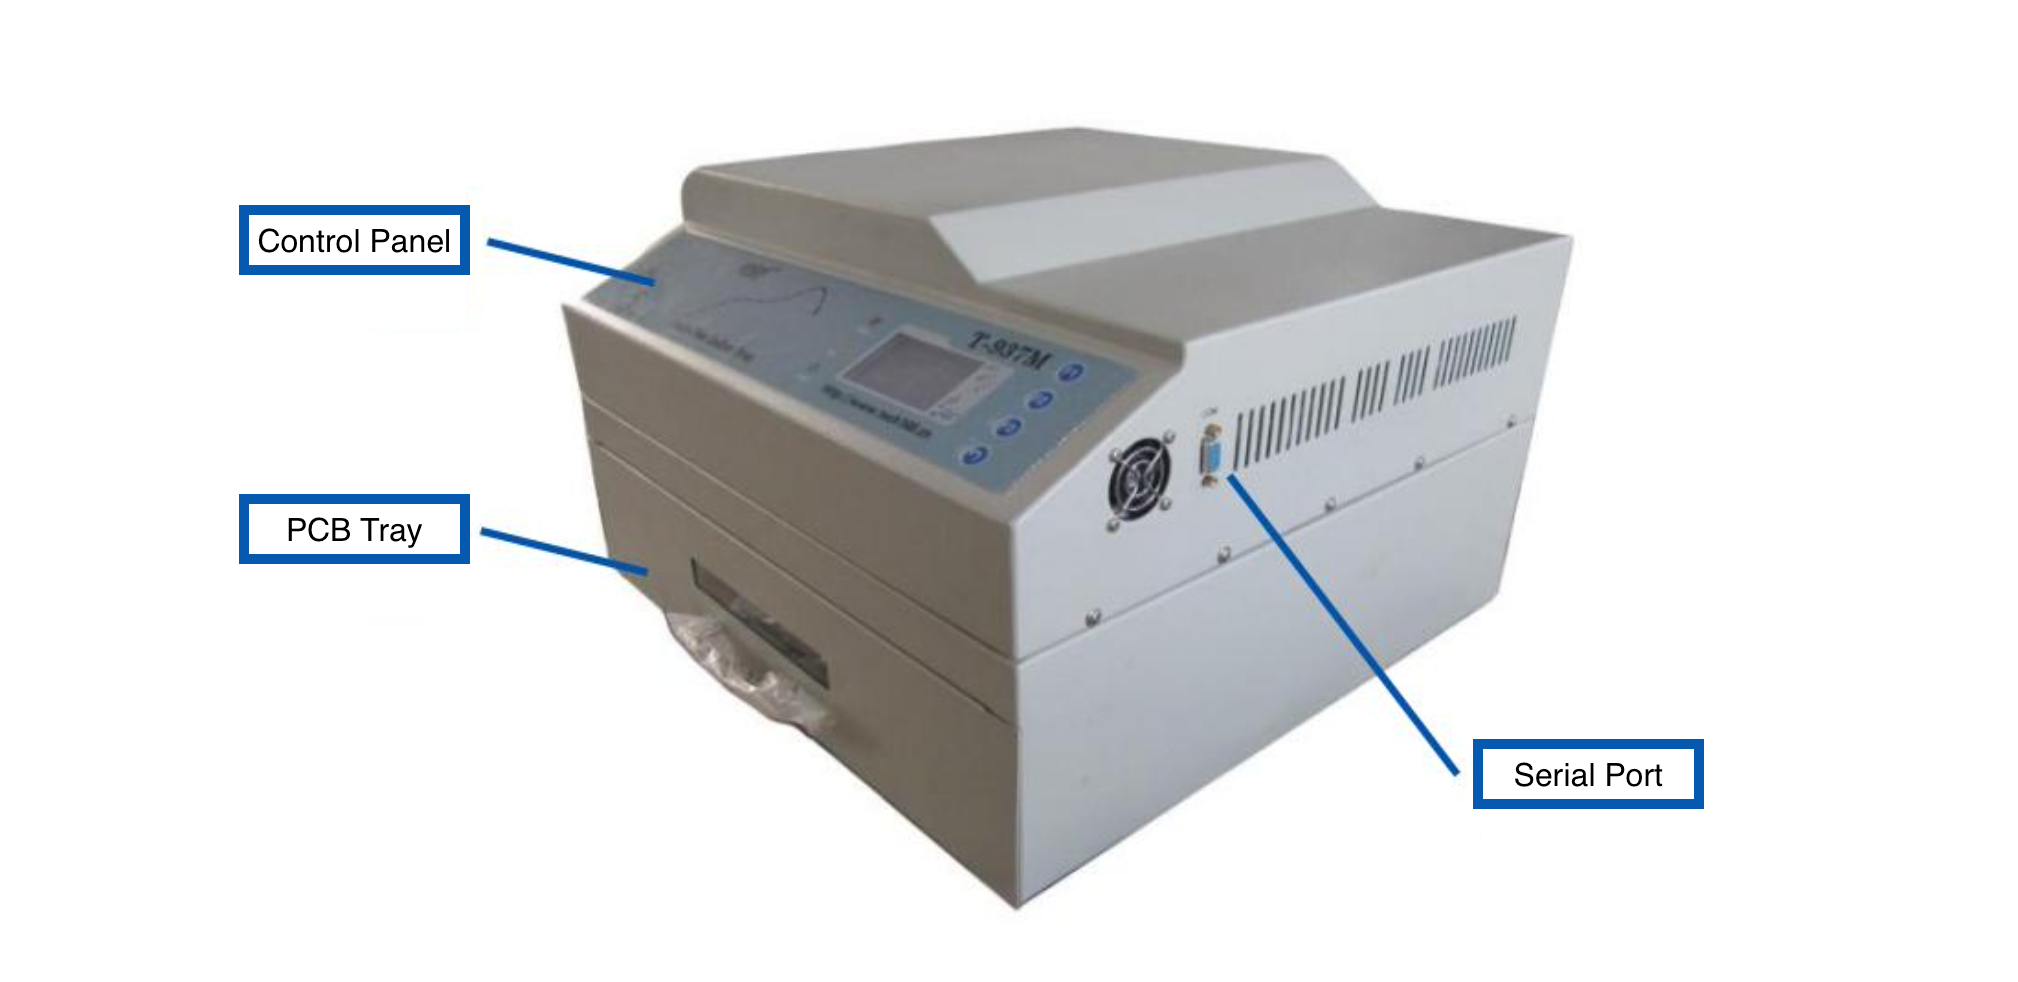
The machine consists of the power switch, positioned on its left side, a serial communication port, positioned on its right side and the main control panel positioned on its front face. Below the main control panel is the tray, in which circuit boards get placed.
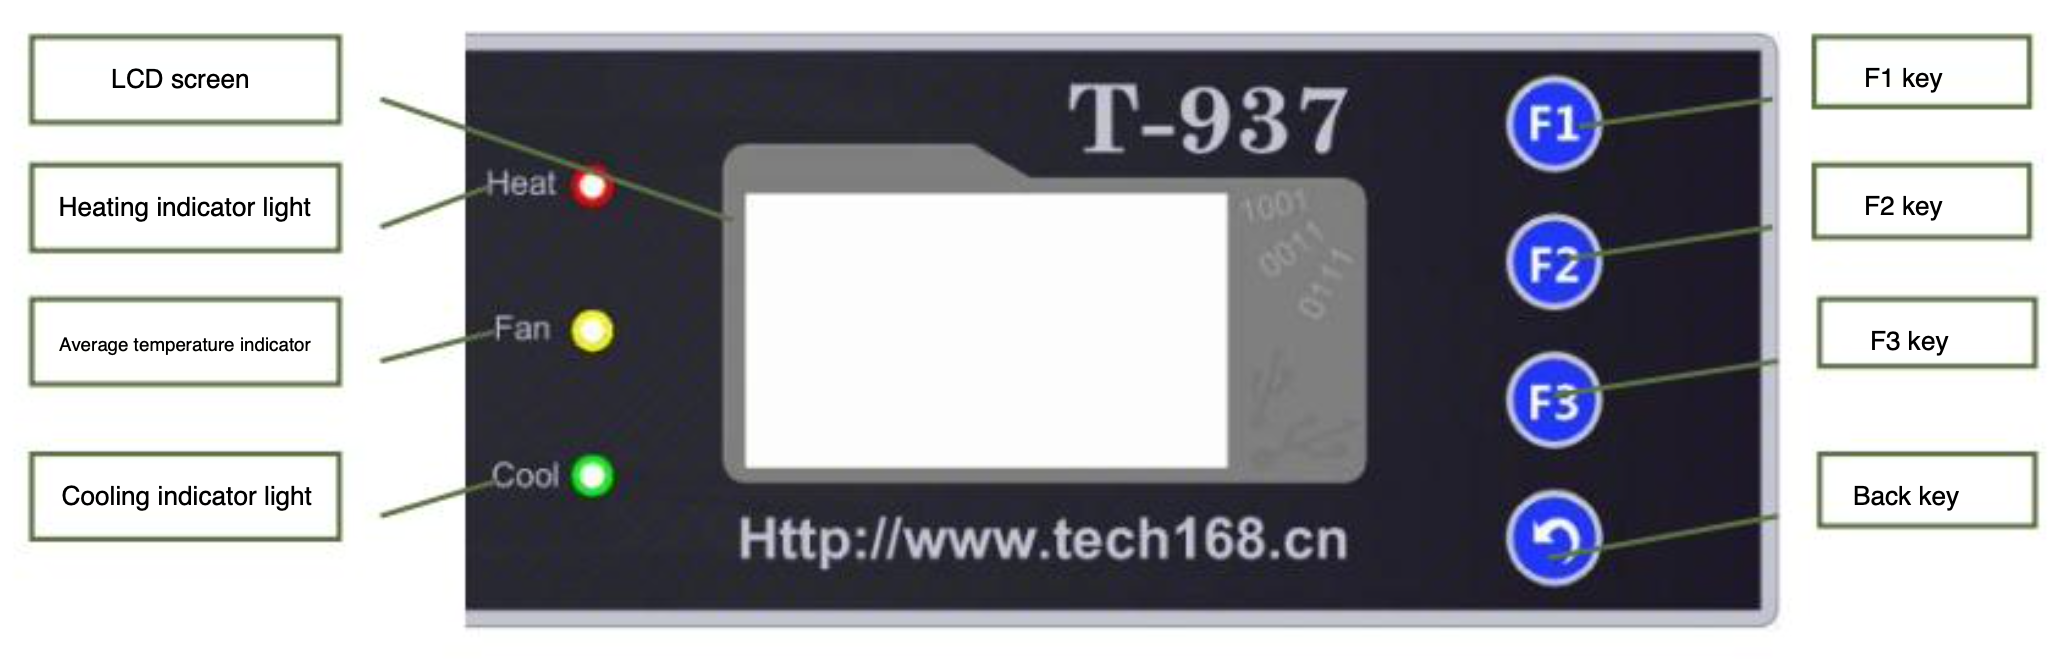
The main control panel has 4 buttons, action buttons F1, F2, F3 and a ↩ (back) button.
To the left of the screen are three indicators, the first indicates when the tray is being heated, the second when the rear fan is venting and the third, when the right-side fan is sucking in room air for cooling.
¶ Basic Usage
Check out Resources for advice on how to achieve the best results.
These instructions detail the basic usage procedure of the reflow oven. This means you are limited to the built-in temperature profiles.
¶ Step 0 - Preparation
Do not use the reflow oven whilst the lasercutter is running!
(Experts use the F13 breaker outlet, to bypass this limitation.)
Before powering on the reflow oven, make sure theres nothing underneath the reflow oven. Then pull it forward as close to the edge as possible.
¶ Step 1 - Turn On Machine
To turn on the machine press the power switch on the left of the machine.
¶ Step 2 - Select Language
Press F3 for English.
¶ Step 3 - Mode Selection
(recommended) Press F1 to use the built-in temperature profiles.
(advanced) Press F2 to connect to your computer for cutom temperature profiles. See Advanced Usage.
¶ Step 4 - Profile Selection
Press F2 to go to the profile selection menu.
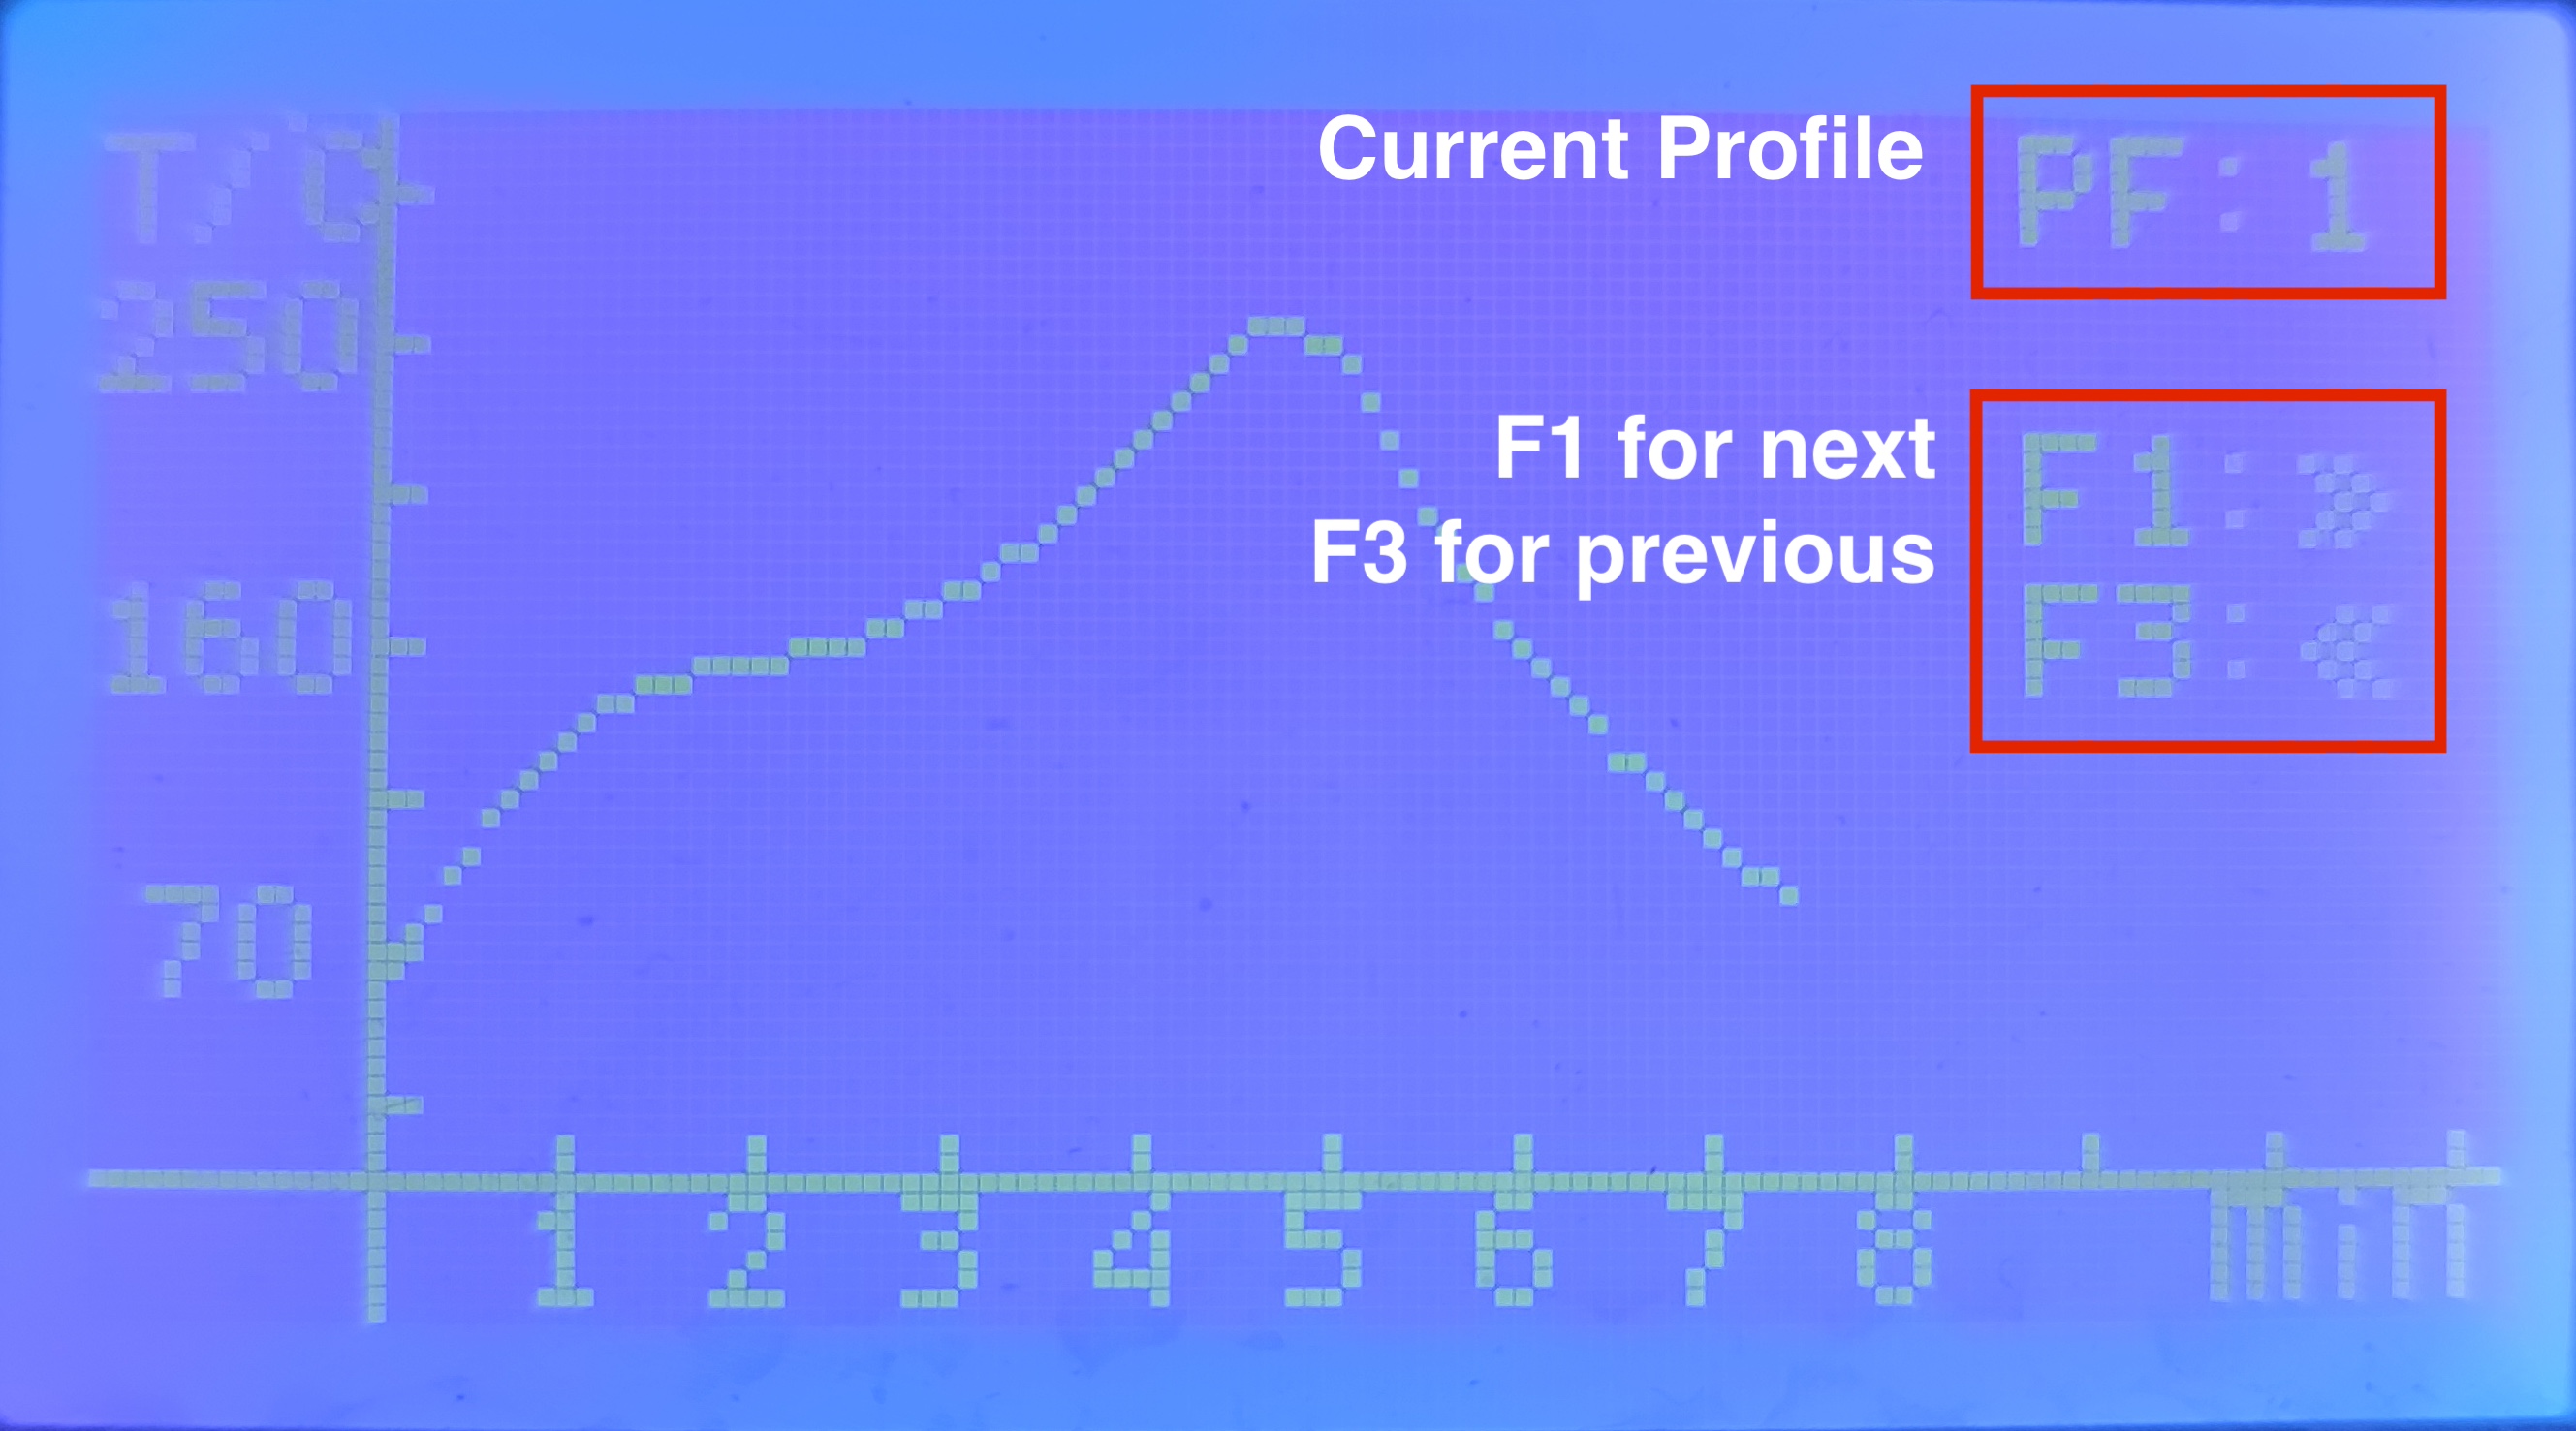
In the top right corner you will see the current displayed profile. You can switch between profiles using F1 and F3. Once you have found your prefered profile press the ↩ (back) button. You are now in the Mode Selection menu again.
¶ Step 5 - Insert your board.
Make sure your board does not touch the heating elements, using the front window, there is less than 4cm vertical clearance!
If you haven't already, you should now place your board within the tray. Place the first board all the way to the back and in the center of the tray.
¶ Step 6 - Profile Excecution
Now press F1 to execute your selected profile.
¶ Step 7 - Monitoring
Your profile is being excecuted.
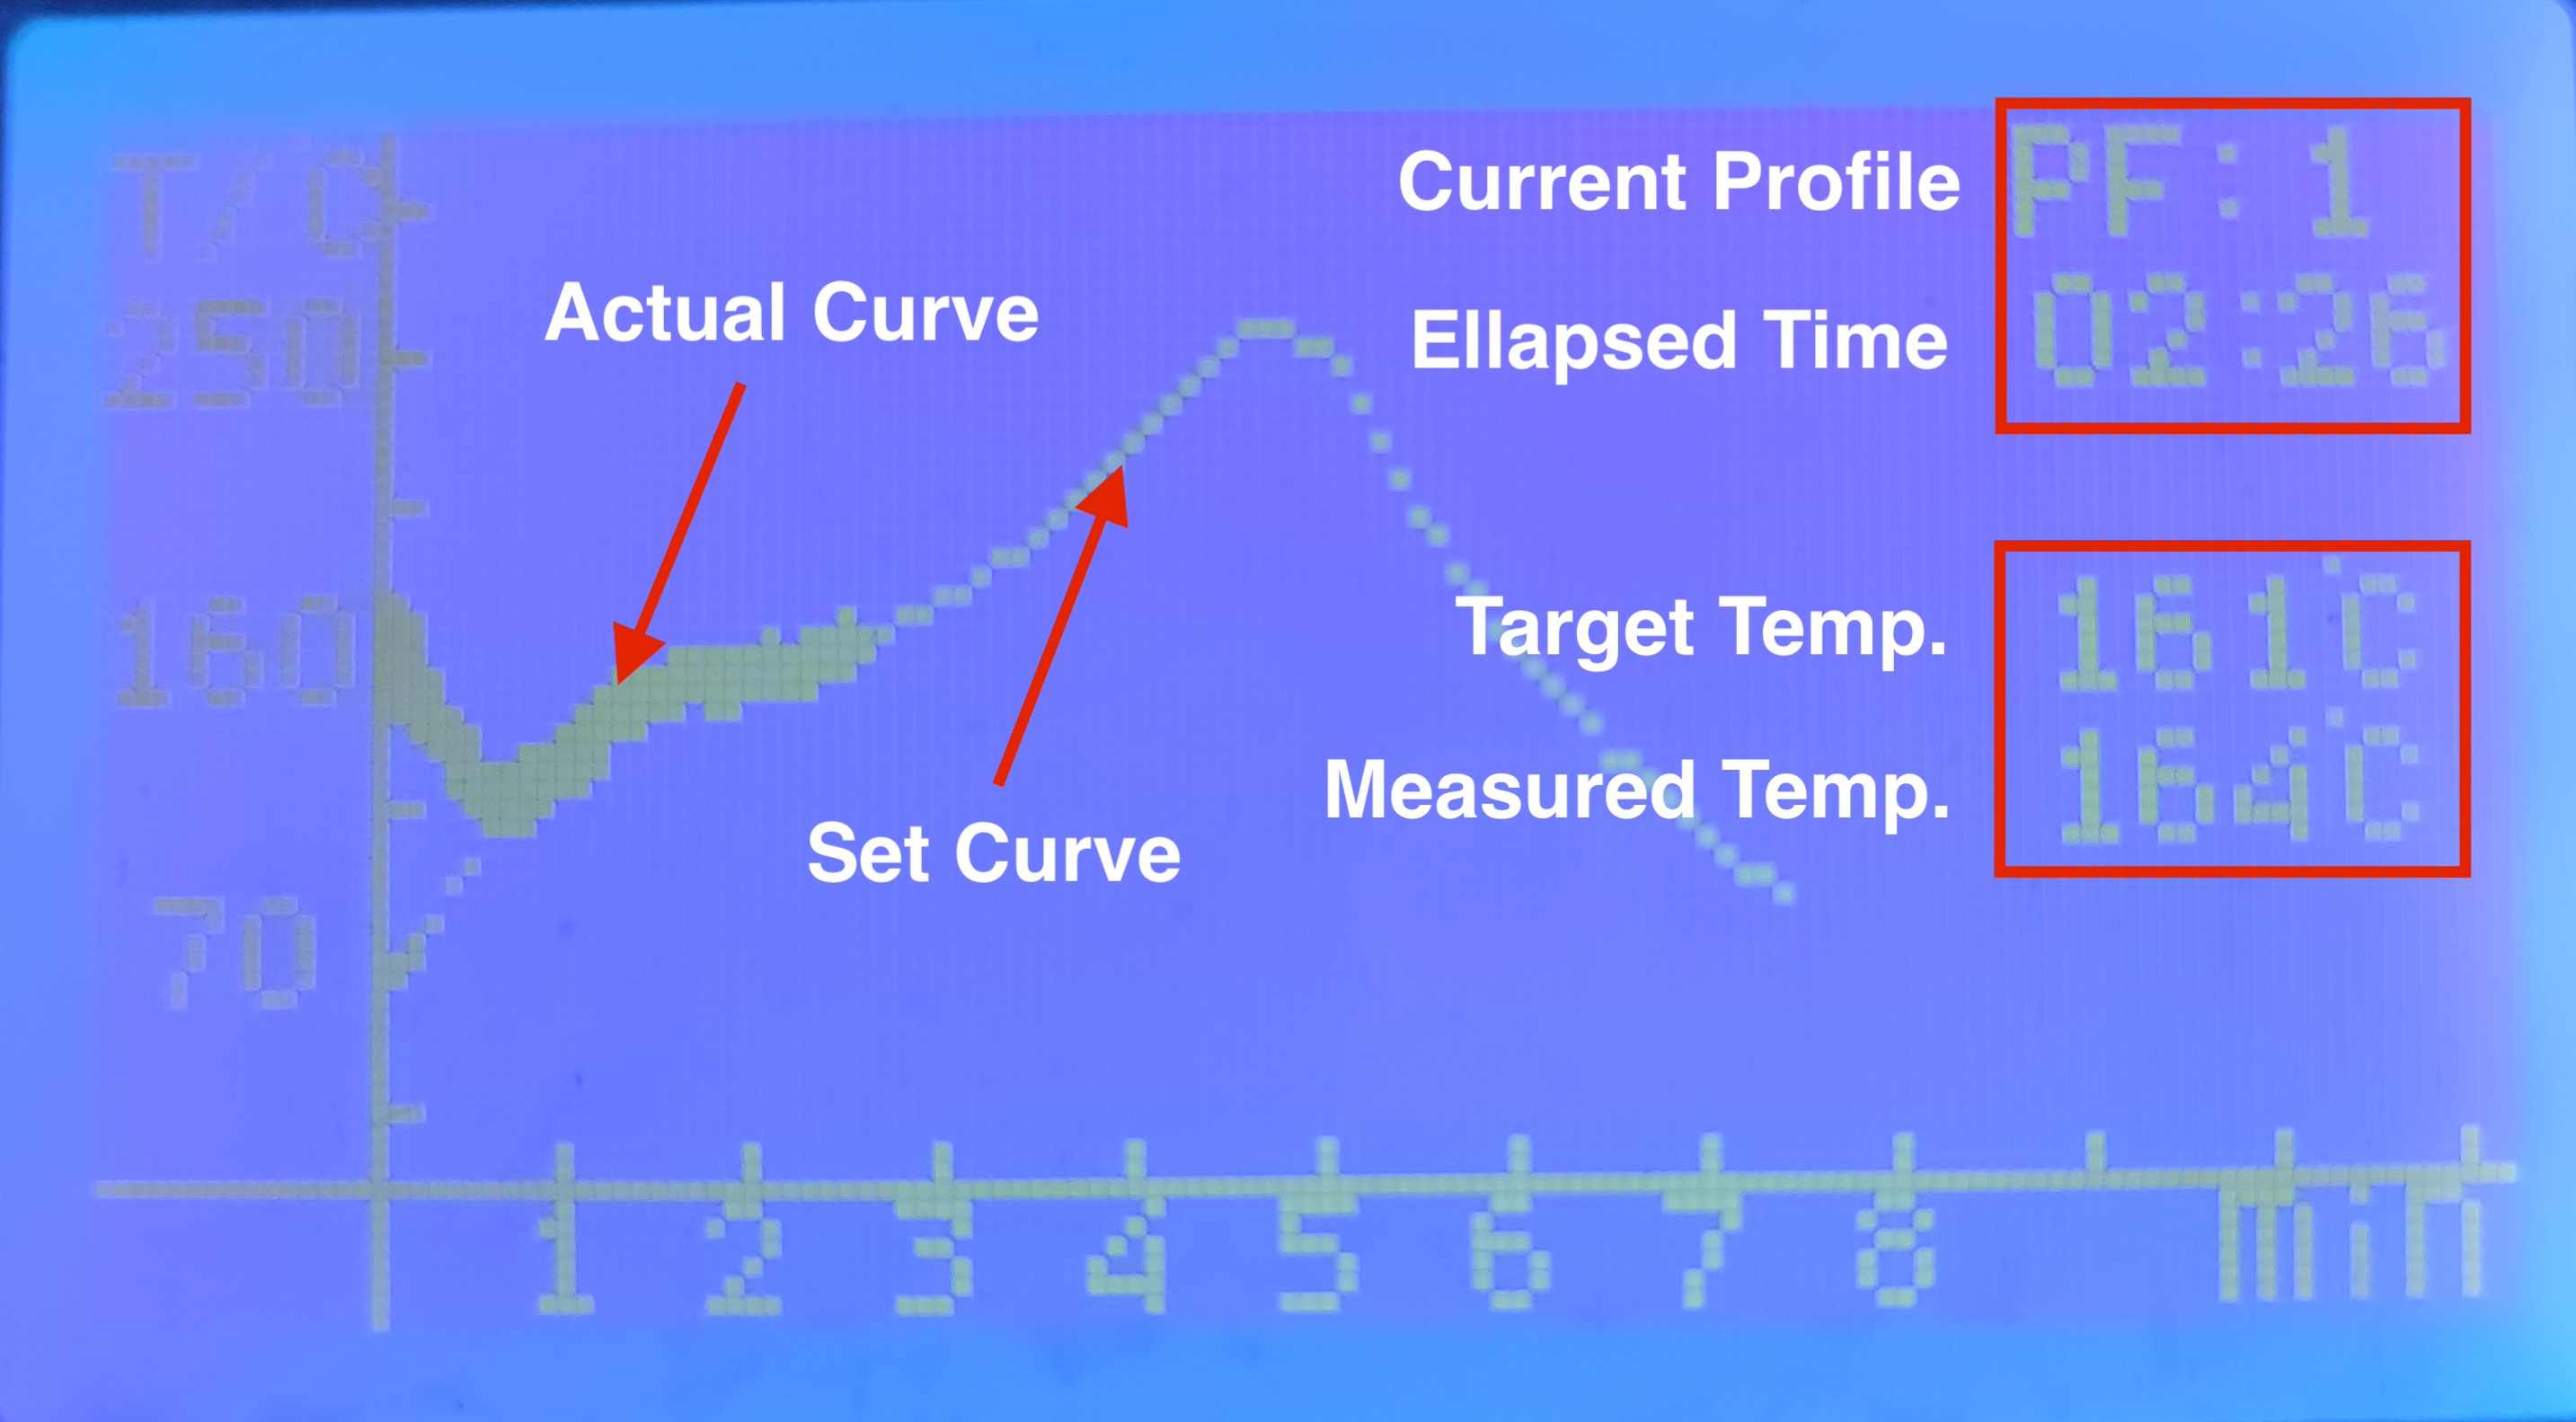
In the top right you will see your selected profile and below that the elpased time.
To the right side of the screen there are two °C values displayed. The upper represents the target temperature and the lower represents the average real-time curve.
The thin graph is the set target curve, as time progresses you will see a thicker line appear, this is the real-time graph. Under normal circumstances this real-time graph should follow the set target curve. If not, check Troubleshooting.
Once the proccess has finished the machine will beep two times.
¶ Step 8 - Cleanup
Once you're finished using the reflow oven, turn off the power switch and unplug the reflow oven. Route the power cable behind the reflow oven, with the plug hanging slightly over the right side of the table. Keep the tray a slight bit open, if the temperature at finish read above 150°C. Lastly push the machine as far back as posssible, to save space.
¶ Advanced Usage
WIP